A malfunctioning HVAC system can be frustrating, especially when you’re trying to stay comfortable during extreme weather. Fortunately, not every issue requires professional intervention. With a bit of guidance, you can perform several DIY HVAC repairs to resolve common issues.
1. Check and Replace the Air Filter
One of the most common reasons an HVAC system struggles is a clogged or dirty air filter. Filters collect dust, debris, and allergens to improve indoor air quality, but when they get dirty, airflow becomes restricted.
Steps to Replace Your Air Filter:
- Locate the filter in your HVAC unit. It’s usually found behind a vent cover or inside the air handler.
- Turn off the HVAC system before opening the cover.
- Remove the old filter and inspect it. If it’s clogged with dust and debris, it’s time for a replacement.
- Insert the new filter with the airflow arrow pointing in the correct direction.
Pro Tip: Change your filter every 1–3 months to prevent airflow problems and improve energy efficiency.
2. Inspect the Thermostat
A thermostat that’s not functioning correctly can cause your HVAC system to behave erratically. Before assuming your system is broken, double-check your thermostat settings.
Steps to Troubleshoot Your Thermostat:
- Ensure the thermostat is set to “heat” or “cool” depending on the season.
- Verify that the temperature is set several degrees above (in winter) or below (in summer) the current room temperature.
- Replace the batteries if your thermostat has them.
- If your thermostat screen is blank, check the circuit breaker for a tripped switch.
Pro Tip: Consider upgrading to a programmable or smart thermostat for improved energy efficiency and control.
3. Reset Your Circuit Breaker
If your HVAC system won’t turn on at all, a tripped circuit breaker may be the culprit. This can happen after a power surge or electrical overload.
Steps to Reset Your Breaker:
- Locate your home’s electrical panel, usually found in a utility room, basement, or garage.
- Look for a tripped breaker—it will be slightly off from the rest.
- Flip the breaker switch off, then turn it back on.
If the breaker continues to trip, this could indicate a deeper electrical issue, and it’s time to call a professional.
4. Clean the Outdoor Unit (Condenser Coil)
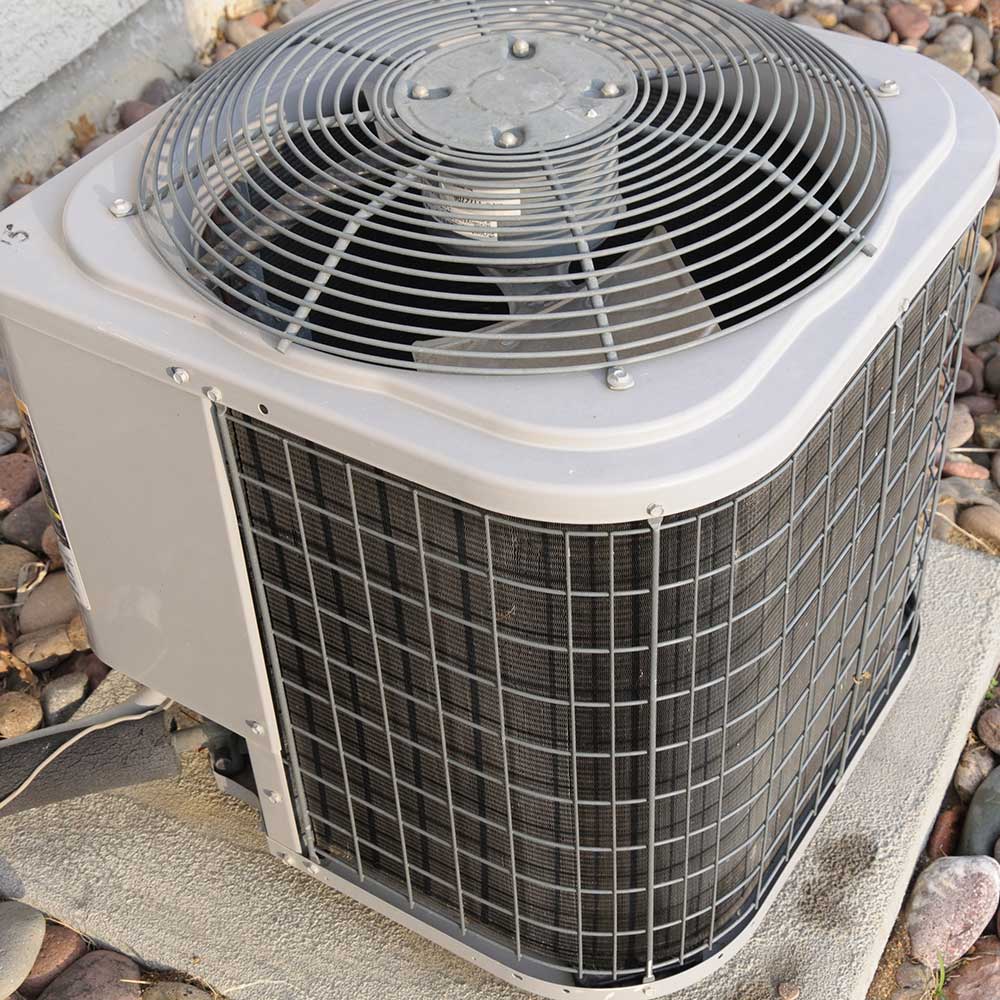
Outdoor condenser units can accumulate dirt, leaves, and debris, reducing airflow and causing your HVAC system to work harder than necessary.
Steps to Clean Your Condenser Coil:
- Turn off the power to your HVAC system at the breaker.
- Use a garden hose to spray the coil fins gently. Avoid using high pressure, which can damage the fins.
- Remove debris like leaves or twigs from the surrounding area.
- Ensure there’s at least two feet of clearance around the unit for optimal airflow.
5. Check the Vents and Registers
Blocked or closed vents can restrict airflow, reducing your HVAC system’s efficiency and causing uneven heating or cooling.
Steps to Clear Your Vents:
- Walk through your home and make sure all supply and return vents are open and unobstructed.
- Remove any furniture, rugs, or objects blocking airflow.
- Use a vacuum cleaner with a hose attachment to remove dust buildup inside the vent openings.
Pro Tip: Avoid closing multiple vents in unused rooms, as this can increase system pressure and cause damage.
6. Inspect the Drain Line
HVAC systems remove humidity by draining moisture through a condensate line. If this line gets clogged, water can back up and shut down the system.
Steps to Clear a Clogged Drain Line:
- Turn off your HVAC system.
- Locate the drain line, typically a PVC pipe near the indoor unit.
- Use a wet/dry vacuum to suck out clogs from the drain line’s exterior end.
- Pour a solution of vinegar and warm water down the drain pipe to dissolve any lingering debris.
7. Check for Frozen Coils
Frozen evaporator coils can block airflow and cause your system to stop cooling effectively. This often results from airflow restrictions or refrigerant issues.
Steps to Thaw Frozen Coils:
- Turn off the HVAC system and switch the thermostat to “fan-only” mode.
- Allow the coils to thaw completely, which may take several hours.
- While thawing, check for dirty filters or blocked vents that may have caused the issue.
If your coils continue to freeze despite troubleshooting, it may indicate a refrigerant leak or compressor problem requiring professional repair.
When to Call a Professional
While these DIY HVAC repair tips can resolve many common issues, some problems require expert intervention. Contact a professional if you experience:
- Persistent system shutdowns despite resetting the breaker.
- Refrigerant leaks or ice buildup that won’t resolve.
- Strange noises, burning smells, or electrical issues.
- Weak airflow or inconsistent temperatures after filter changes and vent adjustments.
Contact Schneider Plumbing, Heating & Air Conditioning Today
Taking the time to troubleshoot your HVAC system can save you money and restore comfort to your home. By following these seven DIY HVAC repair tips, you can often resolve common issues on your own. However, if your system continues to struggle, it’s time to call in the professionals.
At Schneider Plumbing, Heating & Air Conditioning, we’re dedicated to ensuring your home remains comfortable year-round. For over 70 years, our family-owned business has provided reliable HVAC services throughout Jackson and Jennings County. Whether you need expert heating, cooling, or plumbing solutions, we’re here to help.
Contact us today to schedule your HVAC service and experience the Schneider Plumbing, Heating & Air Conditioning difference!
When shopping for a new air conditioning system, understanding SEER ratings is crucial in choosing the most energy-efficient option. SEER ratings play a vital role in determining how well an AC unit performs in terms of energy consumption and cooling power. Knowing what SEER ratings mean and how to compare systems can help you strike the right balance between performance and cost.
Understanding SEER Ratings
Definition and Importance
SEER stands for Seasonal Energy Efficiency Ratio. This metric measures the cooling output of an air conditioning system divided by the energy it consumes during a typical cooling season. The higher the SEER rating, the more efficiently the system operates.
For instance, an air conditioner with a SEER rating of 20 will generally be more efficient than one with a SEER rating of 14. Higher efficiency means lower energy bills and reduced environmental impact. The U.S. Department of Energy mandates minimum SEER ratings for new air conditioners:
- 13 for northern states
- 14 for southern states with hotter climates
Modern systems can achieve SEER ratings of 20 or more, offering improved performance and significant energy savings.
Factors Affecting Energy Efficiency
Installation and Environmental Impacts
While SEER ratings provide an excellent starting point, several other factors influence an AC system’s actual energy efficiency:
- Installation Quality: A high-SEER unit will only deliver optimal efficiency if installed correctly. Improper installation can lead to airflow restrictions, refrigerant imbalances, and leaky ducts, reducing performance.
- Insulation and Home Efficiency: Even the highest-rated system may struggle if your home has poor insulation or inefficient windows and doors. Enhancing your home’s insulation ensures your AC unit doesn’t have to overwork to maintain a comfortable temperature.
- Climate Conditions: Homes in extremely hot and humid regions may require a higher SEER rating to achieve substantial energy savings. Conversely, in cooler regions, a moderate SEER rating may suffice.
- Unit Size: An undersized unit may struggle to cool your home efficiently, while an oversized unit may cycle on and off frequently, reducing efficiency and lifespan. Consulting with an HVAC professional ensures the correct size for your home’s cooling needs.
- Maintenance: Regular maintenance is crucial to sustaining an AC system’s efficiency. Routine tasks like replacing filters, cleaning coils, and ensuring proper airflow can keep your system running at peak performance.
Selecting the Right AC System
Cost vs. Efficiency Considerations
Choosing an air conditioning system often involves balancing initial costs with long-term savings. Here’s what to consider:
- Upfront Cost: Higher SEER units generally come at a higher initial cost. However, this investment often pays off through energy savings over time.
- Energy Savings: A unit with a SEER rating of 16 or higher can significantly reduce your energy consumption, especially in warmer climates. Calculate your potential savings based on your region’s climate and energy costs.
- Rebates and Incentives: Many utility companies and government programs offer rebates for purchasing energy-efficient systems, making high-SEER units more affordable.
- Lifespan and Durability: Investing in a higher-quality system with an optimal SEER rating may increase the lifespan of your unit, reducing the need for frequent repairs or premature replacement.
Making an Informed Choice
When selecting a new air conditioning system, consider working with a trusted HVAC provider like Schneider Plumbing, Heating & Air Conditioning. Our team has been providing reliable cooling solutions to residents in Jackson and Jennings County for over 70 years. As a family-owned business, we prioritize customer comfort and energy efficiency with every installation.
Our expert technicians can help you choose the best SEER-rated system for your home’s unique needs. We’ll assess your space, discuss your budget, and recommend an air conditioning unit that balances performance and affordability. With our commitment to quality service, you can trust Schneider Plumbing, Heating & Air Conditioning to keep your home cool and comfortable throughout the summer.
For expert advice on SEER ratings and energy-efficient air conditioning solutions, contact us today. Let us help you make the smartest investment in your home’s comfort.
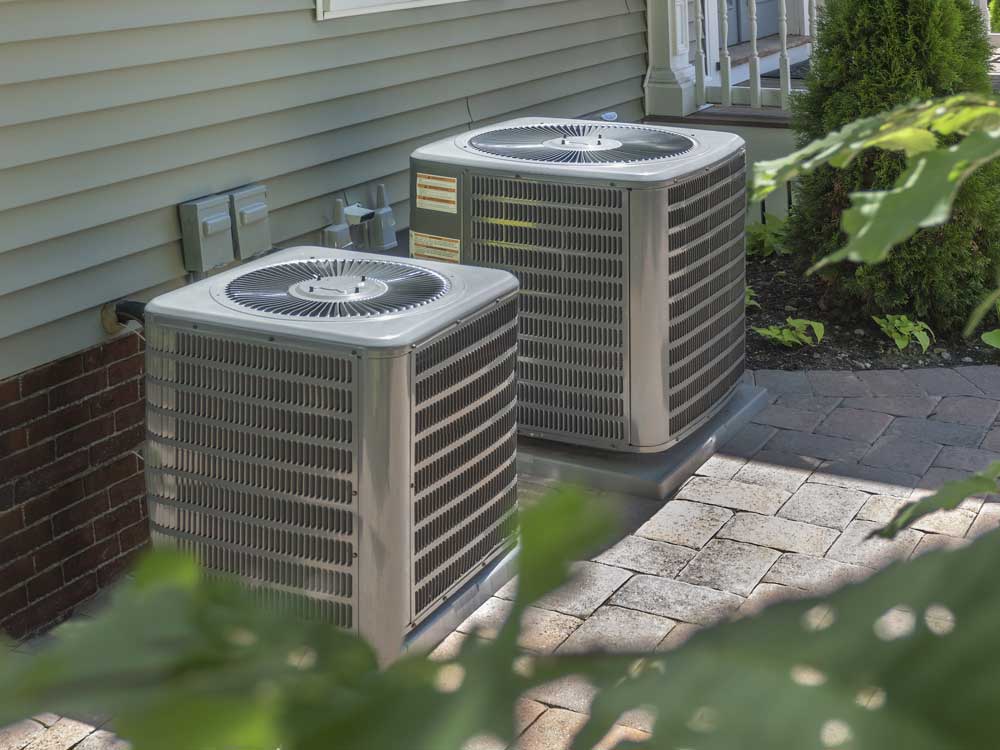
Heating, ventilation, and air conditioning (HVAC) systems play a critical role in maintaining indoor comfort throughout the year. Whether you’re constructing a new home or upgrading an outdated system, investing in an energy-efficient HVAC system can provide significant benefits. From reducing energy consumption to enhancing indoor air quality, these modern systems offer homeowners and businesses long-term value.
Lower Energy Bills
One of the most significant advantages of energy-efficient HVAC systems is the potential for lower utility bills. Traditional heating and cooling systems can consume a substantial amount of energy, leading to high monthly costs. By upgrading to an energy-efficient model, homeowners can reduce their energy consumption, resulting in substantial savings over time. Modern HVAC systems are designed with advanced technology, such as variable-speed motors and programmable thermostats, to optimize energy use without sacrificing comfort.
Reduced Environmental Impact
Energy-efficient HVAC systems help reduce greenhouse gas emissions by consuming less power. Traditional heating and cooling units often rely on fossil fuels, contributing to carbon dioxide (CO2) emissions that impact climate change. By choosing an energy-efficient system, homeowners can significantly lower their carbon footprint. Additionally, many energy-efficient HVAC systems use eco-friendly refrigerants that are less harmful to the environment than older models that rely on ozone-depleting substances.
Improved Indoor Comfort
Energy-efficient HVAC systems are designed to maintain consistent indoor temperatures with minimal fluctuations. Unlike older systems that turn on and off frequently, modern units operate at variable speeds, ensuring a more stable indoor climate. This means you’ll experience fewer hot and cold spots, better humidity control, and improved overall comfort in your home or business. Advanced filtration systems also help improve indoor air quality by reducing allergens, dust, and pollutants.
Longer System Lifespan
New construction HVAC systems that prioritize energy efficiency tend to have a longer operational lifespan than outdated models. Because these systems operate more efficiently and reduce strain on components, they experience less wear and tear over time. Regular maintenance and proper usage can extend the life of your HVAC system, ultimately saving you money on premature replacements and costly repairs.
Enhanced Smart Technology Integration
Energy-efficient HVAC systems are often equipped with smart technology that allows homeowners to control their heating and cooling settings remotely. Features like programmable thermostats, Wi-Fi connectivity, and AI-driven automation enable users to adjust temperature settings from their smartphones or smart home assistants. These advancements not only improve convenience but also contribute to optimized energy usage and increased savings.
Increased Property Value
Installing an energy-efficient HVAC system can increase the value of your property. Homebuyers are increasingly prioritizing energy-efficient features when searching for new homes. Properties with high-efficiency HVAC systems are more attractive to potential buyers because they promise lower utility costs, improved comfort, and reduced maintenance needs. If you’re planning to sell your home in the future, upgrading your HVAC system can be a worthwhile investment.
Government Incentives and Rebates
Many local and federal programs offer incentives and rebates for homeowners who upgrade to energy-efficient HVAC systems. These financial benefits can help offset the initial cost of installation. Some utility companies also provide discounts for customers who choose energy-efficient options. Before installing a new system, it’s a good idea to check with your HVAC provider about available rebates and incentives.
Quieter Operation
Energy-efficient HVAC systems operate much quieter than traditional units. Advanced engineering and improved insulation help reduce noise levels, providing a more peaceful home environment. If you’ve ever been disturbed by the loud cycling of an old HVAC system, upgrading to a quieter, energy-efficient model will make a noticeable difference.
Customized Solutions for New Construction
When planning a new construction project, incorporating an energy-efficient HVAC system from the start ensures seamless integration into the building’s design. New construction HVAC solutions allow homeowners and builders to optimize heating and cooling efficiency with modern insulation, zoning systems, and smart technology. By designing an HVAC system that meets the unique needs of a new home or commercial space, property owners can maximize comfort and efficiency from day one.
The Importance of Professional Installation
Professional installation is essential to fully experience the benefits of an energy-efficient HVAC system. An improperly installed system can lead to inefficiencies, increased energy consumption, and costly repairs. A trusted HVAC provider like Schneider Plumbing, Heating & Air Conditioning ensures that your system is correctly sized and installed for optimal performance.
Invest in Comfort and Efficiency Today
Upgrading to an energy-efficient HVAC system is a smart decision for homeowners and businesses looking to reduce costs, improve comfort, and minimize their environmental impact. Whether you’re building a new home or replacing an outdated system, Schneider Plumbing, Heating & Air Conditioning has the expertise to guide you through the process. With over 70 years of experience serving Jackson and Jennings County, our family-owned HVAC company is committed to delivering high-quality heating, cooling, and plumbing services. Contact us today to learn more about energy-efficient HVAC solutions and schedule your consultation.
Older homes offer character, craftsmanship, and history that new construction rarely matches, but the plumbing hidden in the walls often tells a different story. Knowing the most common plumbing issues in older homes helps you spot trouble early, plan repairs on your terms, and avoid the water damage that tends to follow when aging pipes finally give out.
The challenge is that decades-old plumbing fails in specific, predictable ways, depending on the materials your home was built with. At Schneider Plumbing, Heating & Air Conditioning, we work on older homes every week, so here is what we see most often, what it means for your home, and how to fix it.
Common Plumbing Issues in Older Homes
Homes with decades of history are far more common than most people realize. According to federal survey data from the U.S. Energy Information Administration, about 52% of U.S. homes were built before 1980, and roughly 37% were built before 1970. That means a large share of American households are living with plumbing that was designed for a very different era.
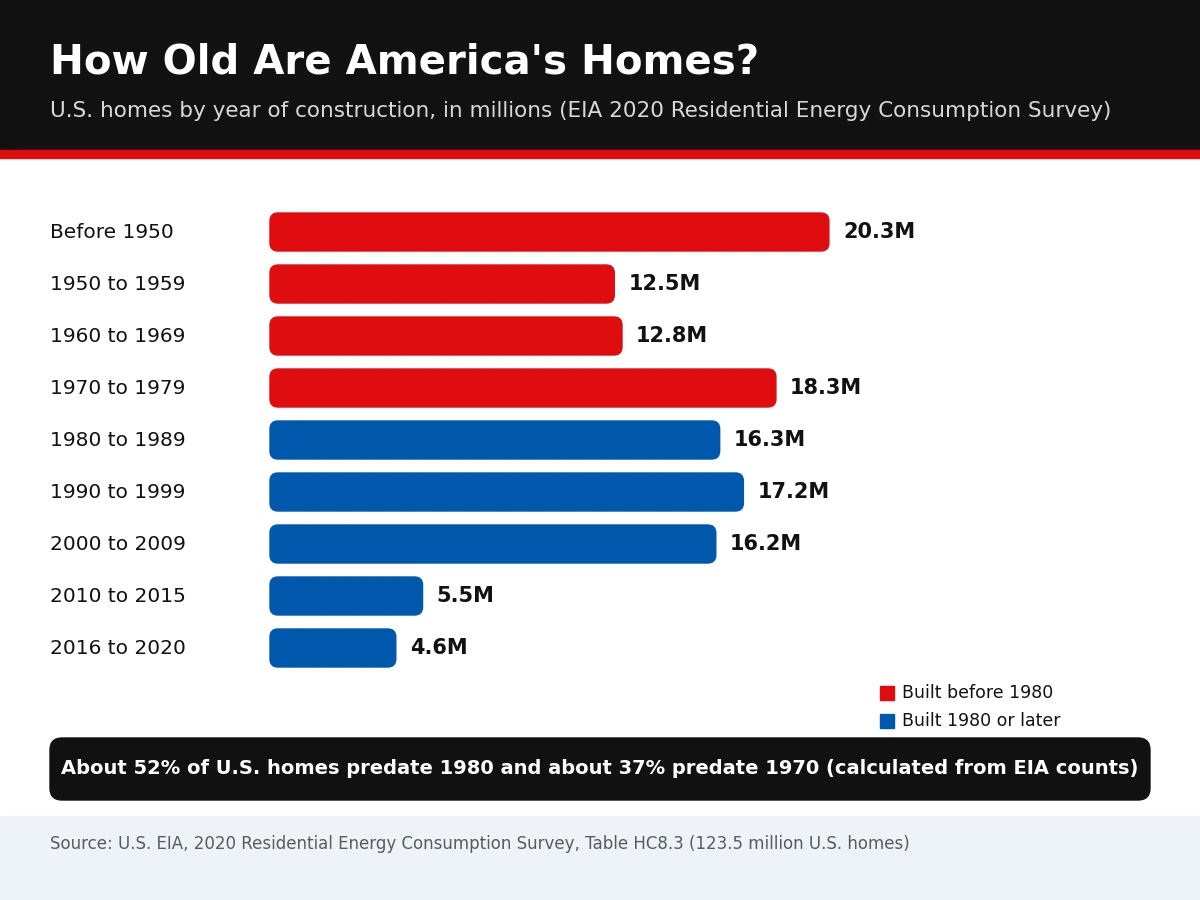
Source: U.S. Energy Information Administration, 2020 Residential Energy Consumption Survey. Percentages calculated from EIA home counts.
Plumbing Issues in Older Homes by Pipe Material and Age
The materials in your walls determine which problems you are most likely to face. The eras below are approximate, since builders and regions varied, but they give you a useful starting point.
| Material |
Typical Era |
Common Problem |
| Lead pipe and solder |
Before the 1986 federal ban |
Lead can leach into drinking water |
| Galvanized steel supply pipe |
Early to mid 1900s, into the 1960s |
Internal rust, buildup, low pressure |
| Cast iron drain pipe |
Early 1900s through the 1970s |
Rust, cracking, slow drains |
| Clay and Orangeburg sewer pipe |
Early 1900s through the 1970s |
Root intrusion, collapse, offset joints |
| Polybutylene supply pipe |
Late 1970s to mid 1990s |
Brittleness and sudden leaks |
Corroded and Leaking Pipes
Corrosion is the most widespread issue in aging plumbing. Metal pipes slowly rust or scale from the inside, which thins the walls until a pinhole leak forms. Because many of those pipes sit behind drywall or under floors, a small leak can run for months before anyone notices.
Watch for these warning signs:
- Discolored water: brown, yellow, or reddish water often means rust is breaking loose inside the pipe.
- Stains on walls or ceilings: water marks and bubbling paint point to a leak behind the surface.
- Green or white crust on exposed pipes: corrosion at joints and fittings is a sign the metal is deteriorating.
- Musty odors: persistent dampness can signal a slow hidden leak.
- Rising water bills: a bill that climbs with no change in habits often points to a leak somewhere in the system.
When the source is hidden, professional leak detection locates the problem without tearing open walls, using acoustic equipment, pressure testing, and thermal imaging. Knowing the exact location also keeps repair costs down, because only the damaged section has to be opened up.
Once the leak is found, the next question is how much of the pipe is affected. Isolated damage in otherwise healthy pipe can often be fixed with targeted pipe repair, while widespread corrosion or repeated leaks usually mean it is time to replace the pipe instead of patching it again.
Low Water Pressure in Older Homes
Weak pressure is another frequent complaint, and in older homes it usually has one of four causes:
- Corroded or clogged pipes: rust and mineral scale narrow the inside of galvanized steel pipe, so less water gets through.
- A failing pressure regulator: the valve that controls incoming pressure wears out over time.
- Hidden leaks: water escaping before it reaches your fixtures lowers pressure at the tap.
- Undersized or outdated piping: older layouts were not designed for today’s fixtures and water demand.
Most homes are designed to run at roughly 40 to 80 PSI, and a simple gauge on an outdoor spigot can show whether your pressure is in range. If pressure is low in every fixture, the issue is likely at the main line or regulator. If it is low at only one or two fixtures, the cause is usually local buildup or a failing valve or cartridge. Fixes range from replacing a regulator to cleaning or replacing the affected piping.
Slow Drains and Aging Sewer Lines
Drain pipes age just like supply pipes. Cast iron rusts and develops rough interior surfaces where grease and debris collect, clay pipe cracks and shifts at the joints, and Orangeburg pipe, which is made of bonded tar paper, can deform or collapse. Tree roots exploit any weakness, working their way in through joints and cracks.
Several slow drains at once, gurgling sounds, or sewage odors usually mean a problem in the main line rather than a single fixture. Regular professional drain cleaning clears buildup, and a camera inspection shows whether the pipe underneath is sound.
If the camera shows that roots, cracks, or a collapse have damaged the line, cleaning alone will not hold. At that point, sewer line repair restores the pipe before a backup inside the house forces the issue.
Old Fixtures, Valves, and Shutoffs
Smaller components fail too. Shutoff valves under sinks and toilets can seize or leak when you finally try to use them, old supply lines can burst, and original faucets and toilets often waste water or leak at worn seals. These parts are inexpensive to replace, and swapping them proactively is one of the easiest ways to prevent a flood.
Plumbing Problems in Old Homes: Lead, Galvanized Steel, and Polybutylene
Some plumbing problems in old homes go beyond leaks and low pressure. Three materials in particular deserve attention because they affect safety, water quality, and long-term reliability.
Lead Pipes, Fixtures, and Solder
The EPA states that homes built before 1986 are more likely to have lead pipes, fixtures, and solder. Lead can enter drinking water when those materials corrode, and the EPA estimates that drinking water can make up 20 percent or more of a person’s total lead exposure.
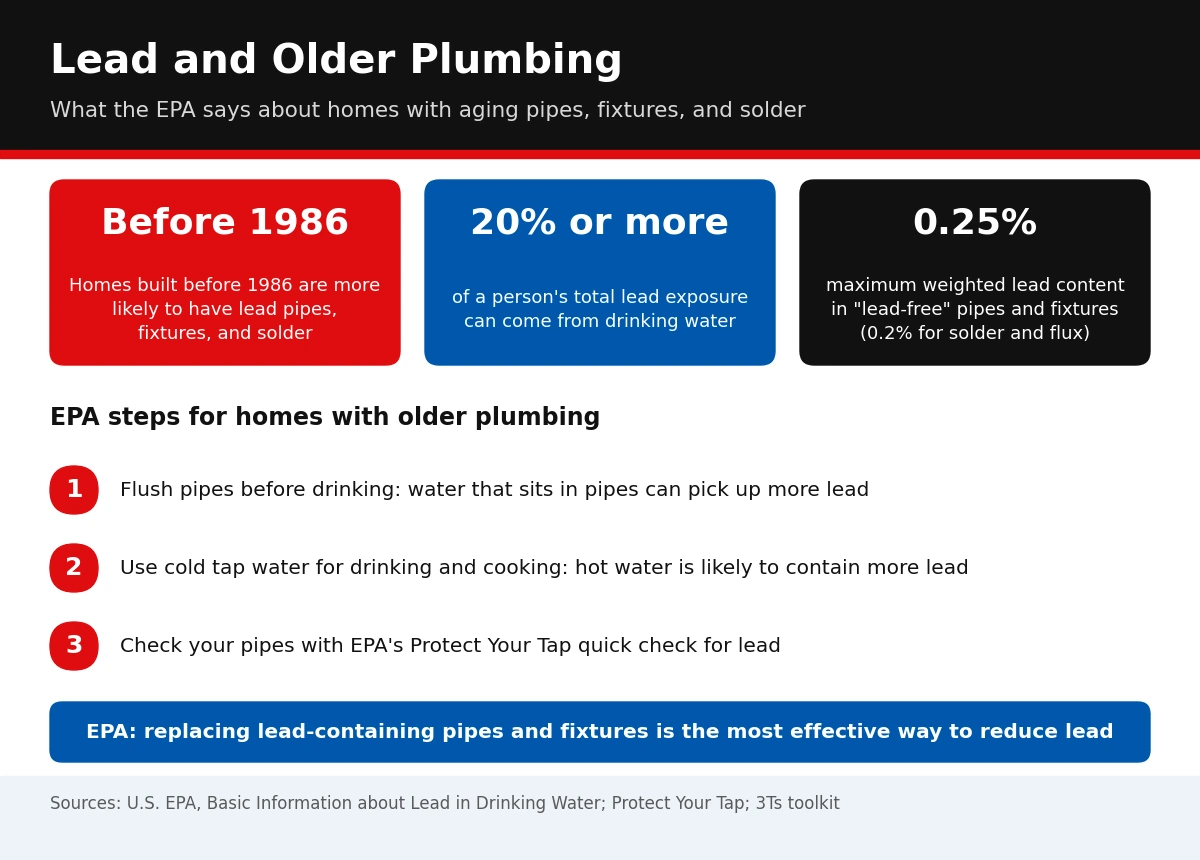
Sources: U.S. EPA, Basic Information about Lead in Drinking Water and EPA’s Protect Your Tap quick check
If your home predates 1986, it is worth finding out what your pipes are made of. Lead pipe is soft, dull gray, and shows a shiny silver surface when scratched lightly, and a magnet will not stick to it. A licensed plumber can confirm the material and test or recommend next steps. Until you know, the EPA advises flushing your pipes before drinking and using cold water for drinking and cooking, since hot water is likely to contain higher levels of lead. Many older homes are also connected to the street by an aging main line, so it helps to have your water line repair options in mind if that line turns out to be old or corroded.
Galvanized Steel Pipe
Galvanized steel was a standard supply pipe for decades. The zinc coating protects it for a while, but it eventually wears away and the steel rusts from the inside out. The results are rusty water, shrinking flow, and leaks at threaded joints. A home with galvanized pipe that has low pressure and discolored water is usually near the end of the pipe’s service life.
Polybutylene Pipe
Polybutylene is a gray, blue, or black plastic pipe that was widely installed from the late 1970s through the mid 1990s. It became known for becoming brittle and failing at fittings, sometimes without warning. If your home was built or renovated in that window and has this pipe, replacement is generally recommended, and it can also affect insurance and resale.
How to Fix Old House Plumbing Issues
Repair or Replace?
The right answer depends on how widespread the problem is. Use this as a general guide:
| Situation |
Usually Best Approach |
| One isolated leak in otherwise healthy pipe |
Targeted repair |
| Repeated leaks in the same area or on the same line |
Replace that section |
| Rusty water and low pressure throughout the house |
Whole-home re-piping |
| Lead or polybutylene pipe confirmed |
Replacement of affected pipe |
| Damaged underground water or sewer line |
Trenchless or open-cut replacement |
Re-Piping Options for Older Homes
When pipes are failing throughout the house, piecemeal repairs add up quickly and rarely solve the underlying problem. Full home re-piping replaces aging supply lines with modern materials such as PEX or copper, which resist corrosion and restore steady flow. Many homeowners choose a phased approach, replacing the highest-risk sections first, such as exposed basement runs or lines that have already leaked, then continuing as budget allows.
Epoxy pipe lining is another option some contractors offer, where a coating is applied inside the existing pipe. It works best on pipe that is structurally sound, and it is not right for every situation, so ask whether a lining product is approved for drinking water before agreeing to it.
Trenchless Repair for Underground Lines
Underground water and sewer lines in older homes often run beneath driveways, landscaping, and mature trees. Trenchless methods replace the line through small access points instead of a long trench, which can save a yard from being torn up. A camera inspection tells your plumber whether the line is a candidate or whether it needs conventional excavation.
Preventing Water Damage in Older Homes
Know Where Your Main Shutoff Is
Every household member should know where the main water shutoff is and how to operate it. In an older home the valve can be stiff or corroded, so test it once a year and have it replaced if it will not close fully. In a burst-pipe emergency, those few seconds matter.
Inspect and Maintain on a Schedule
- Check under sinks and around toilets for moisture, corrosion, and soft cabinet floors.
- Look at exposed pipes in basements, crawl spaces, and utility rooms for rust, crust, or drips.
- Watch your water meter: if it keeps moving when every fixture is off, you may have a leak.
- Schedule a professional inspection every year or two, or right away after buying an older home.
Why Fast Repairs Matter
Leaks rarely stay small. Moisture inside walls and floors feeds mold, which can begin to grow within a day or two on damp materials, and it softens framing and drywall. Fixing a leak early costs a fraction of repairing the damage it causes later, and it protects the air quality and structure of the house.
Why Older Plumbing Calls for an Experienced Professional
Accurate Diagnosis Without Guesswork
Older systems often hide their problems. Video pipe inspections, pressure testing, and leak detection equipment let a professional see what is happening inside the pipe instead of guessing, which keeps repairs targeted and avoids unnecessary demolition.
Code Compliance
Existing plumbing in an older home is often allowed to stay as it is, but new work generally has to meet current code. That can affect pipe sizing, venting, shutoff valves, and fixtures, and it is one more reason to hire someone who knows what is required. Permits and inspections protect you when you sell or insure the home.
Long-Term Value
DIY fixes on aging systems can create new leaks, break brittle fittings, or turn a small job into a large one. An experienced licensed plumbing contractor will diagnose the real problem, recommend the right materials, and give you a clear scope and price, so you spend money once instead of repeatedly.
Plumbing Issues in Older Homes FAQs
What are the most common plumbing issues in older homes?
The most common issues are corroded and leaking pipes, low water pressure, slow drains from aging cast iron or clay lines, failing shutoff valves and fixtures, and outdated materials such as lead, galvanized steel, and polybutylene pipe.
How do I know if my old house has lead pipes?
The EPA says homes built before 1986 are more likely to have lead pipes, fixtures, and solder. Lead pipe is soft and dull gray, shows a shiny silver surface when lightly scratched, and is not attracted to a magnet. A licensed plumber or your water utility can confirm the material, and the EPA offers a Protect Your Tap quick check for lead.
Should I replace galvanized pipes in an older home?
If galvanized pipes are causing rusty water, low pressure, or repeated leaks, replacement is usually the best long-term fix because the pipe corrodes from the inside and keeps getting worse. A plumber can inspect the system and recommend whether to replace it all at once or in phases.
Is polybutylene pipe a problem?
Polybutylene was widely installed from the late 1970s through the mid 1990s and is known for becoming brittle and failing at fittings. Replacement is generally recommended, and it can also affect homeowners insurance and resale.
Why is the water pressure low in my old house?
Common causes include rust and mineral buildup inside galvanized pipes, a failing pressure regulator, hidden leaks, and outdated or undersized piping. Low pressure at every fixture usually points to the main line or regulator, while low pressure at one fixture is often a local issue.
How do I tell if I have a hidden leak?
Warning signs include rising water bills, stains or bubbling paint on walls and ceilings, musty odors, and a water meter that keeps moving when all fixtures are off. A professional can confirm and locate the leak with specialized detection equipment.
How often should plumbing be inspected in an older home?
A professional inspection every year or two is a good rule for an older home, and a thorough inspection is wise right after you buy one. Older systems can fail with little warning, so regular checks catch problems while they are still small.
Protect Your Older Home With a Plumbing Plan
Older plumbing does not have to be a source of constant worry. Once you know which materials are in your walls and which warning signs to watch for, you can fix problems early, replace the highest-risk pipes on your own schedule, and keep your home safe and dry for years to come.
Schneider has been family-owned since 1948, and we treat every older home with the care it deserves. If you are seeing leaks, low pressure, or rusty water, or you simply want to know what you are dealing with, schedule a plumbing inspection with our team and we will walk you through your options.