The Schneider Team represents the licensed plumbers and HVAC technicians at Schneider Plumbing, Heating and Air Conditioning, a family-owned business serving Seymour, Indiana since 1948. Founded by Louis Schneider and now run by the third generation of the family, our team combines decades of field experience with a straightforward approach to service. We write to help homeowners understand their systems, spot problems early, and know when it's time to call a professional.
When it comes to thermostat installation, homeowners are often faced with a common question: Should you tackle the job yourself or call in a professional? On the surface, replacing or installing a thermostat may seem straightforward—a small device mounted on the wall that connects to your HVAC system. However, what’s hidden behind the wall can make the difference between a smooth upgrade and a costly, frustrating mistake.
While DIY installation might seem appealing for those who enjoy hands-on projects, professional installation offers peace of mind, efficiency, and long-term reliability—especially as modern thermostats grow more sophisticated. Let’s explore the pros and cons of each approach, common mistakes to avoid, and why hiring a technician often comes out on top.
Pros and Cons of DIY Installation
Many homeowners are drawn to the idea of installing a thermostat themselves because it can save on upfront labor costs. With the right tools, a YouTube tutorial, and some basic knowledge, a confident DIYer might complete the project in an hour or two. But there’s more to consider than just potential savings.
Benefits of DIY Installation
Lower Initial Cost – You avoid labor charges, which can range from $75 to $200 depending on your location and the complexity of the system.
Immediate Control – You can replace the thermostat at your convenience without scheduling an appointment.
Satisfaction and Learning – For the handy homeowner, there’s pride in successfully completing a home improvement task.
Risks and Drawbacks of DIY Installation
Electrical Safety Hazards – Thermostats connect directly to your home’s HVAC control wiring, and incorrect wiring can short-circuit your system, damage the thermostat, or even pose a fire risk.
Compatibility Errors – HVAC systems vary widely, and not every thermostat works with every system. Choosing the wrong one can mean wasted money and a system that won’t operate properly.
Loss of Warranty – Many thermostat and HVAC manufacturers require professional installation to maintain warranties. DIY work might void coverage.
Hidden Complexity – While older thermostats were simple, modern units—especially smart thermostats—often require software setup, Wi-Fi connectivity, and sometimes a common wire (C-wire) installation.
When to Hire a Technician
Professional HVAC technicians bring not only the right tools but also years of experience and training. This expertise ensures your thermostat is compatible, installed correctly, and optimized for your comfort and efficiency needs.
Wiring and Compatibility Issues
One of the most common pitfalls in DIY thermostat installation is wiring. HVAC systems can operate on low voltage, high voltage, or even millivolt systems, and wiring configurations vary significantly. Miswiring can cause your heating or cooling to malfunction—or stop working altogether.
A professional technician will:
Verify Compatibility – Ensuring the thermostat matches your HVAC system type (single-stage, multi-stage, heat pump, or zoned system).
Handle C-Wire Installation – Many modern thermostats require a C-wire to provide continuous power. If your current setup lacks one, a pro can run new wiring safely.
Check System Load – Some systems need relays or adapters to work with advanced thermostats.
Benefits of Hiring a Pro
Expert Troubleshooting – If something isn’t working, technicians can quickly diagnose the issue.
Safe Handling – HVAC professionals understand electrical safety and building codes.
Optimal Performance – Proper calibration ensures your HVAC system runs efficiently, extending its lifespan and reducing energy costs.
Smart Thermostat Considerations
The rise of smart thermostats—like the Nest, Ecobee, and Honeywell Lyric—has changed the thermostat landscape. These devices offer energy-saving features, remote access, and detailed usage reports, but they also introduce more complexity.
Features of Modern Thermostats
Smart thermostats often include:
Learning Algorithms – They adapt to your schedule automatically over time.
Geofencing – Adjusts temperature based on your smartphone’s location.
Integration with Smart Homes – Works with voice assistants, security systems, and lighting controls.
Energy Usage Reports – Helps identify ways to save on utility bills.
While these features are appealing, setup can involve connecting to your home’s Wi-Fi, creating user accounts, linking to other smart devices, and navigating app-based controls. A technician familiar with these systems can streamline setup, ensure all features work correctly, and even guide you through operation.
Cost Comparison and Savings
When deciding between DIY and professional thermostat installation, it’s tempting to focus only on the upfront cost. But the total value goes beyond initial expenses.
DIY Installation
Thermostat cost: $50–$300 depending on features.
Labor: $0 if self-installed.
Potential hidden costs: Damaged HVAC control board ($200–$600), hiring a pro later to fix mistakes, voided warranties.
Professional Installation
Thermostat cost: Same as DIY, often purchased through the technician or brought by the homeowner.
Labor: $75–$200 on average.
Added value: Ensures warranty protection, optimal operation, reduced energy costs over time.
In many cases, professional installation pays for itself by preventing mistakes and maximizing efficiency, especially with high-end smart thermostats.
Common DIY Mistakes That Can Cost You
Even the most confident DIYers can stumble when it comes to thermostat installation. Some of the most frequent errors include:
Not turning off the power before starting work.
Incorrect wiring leading to short circuits.
Installing in the wrong location, such as near a draft, heat source, or direct sunlight, which can throw off temperature readings.
Skipping system configuration so the thermostat doesn’t communicate properly with the HVAC system.
Each of these mistakes can result in higher energy bills, equipment damage, or the need for emergency repairs.
Why Professional Installation is Worth It
While DIY thermostat installation might look simple on paper, the real-world complexity can quickly outweigh the initial cost savings. A professional brings:
Peace of mind knowing your HVAC system will run safely and efficiently.
Time savings by completing the job quickly and correctly.
Expert advice on the best thermostat for your needs and budget.
In short, when it comes to something as central to your home’s comfort and efficiency as the thermostat, hiring a pro is a wise investment.
Final Thoughts
A thermostat might be small, but it plays a big role in your home’s comfort and energy efficiency. While DIY installation may work for a select group of handy homeowners, most people benefit more from professional service, especially with today’s advanced smart thermostats and varied HVAC systems.
Contact Us Today
If you’re considering upgrading your thermostat, trust the experts at Schneider Plumbing, Heating & Air Conditioning. For over 70 years, we’ve proudly served Jackson and Jennings County, helping our neighbors enjoy comfortable, efficient homes. As a family-owned HVAC company, we’re committed to delivering the highest level of service, whether you need a simple upgrade or a complex smart thermostat installation.
Contact us today to schedule your professional thermostat installation and enjoy peace of mind knowing the job will be done right the first time.
If you own a heat pump, you already know it is one of the most efficient ways to heat and cool your home year-round. But even the most advanced systems need regular care to keep performing at their best. Heat pump maintenance is the key to ensuring your unit runs smoothly, avoids costly breakdowns, and lasts for years to come. Neglecting maintenance can lead to efficiency losses, higher energy bills, and premature system failure, all of which are avoidable with the right care schedule.
Why Regular Heat Pump Maintenance Matters
Your heat pump is a workhorse. Unlike a traditional furnace or air conditioner that only runs during one season, a heat pump provides both heating and cooling, often operating nearly year-round. That near-constant use means it experiences more wear and tear than single-function systems, and more opportunity for small problems to grow into expensive ones.
When maintenance gets skipped, minor issues like a dirty filter or slightly low refrigerant can snowball into major failures. Here is what consistent service protects:
Energy Efficiency: Dust, debris, and worn parts force your system to work harder and consume more electricity to deliver the same comfort.
System Longevity: Well-maintained heat pumps regularly reach 15 years or more. Neglected systems often fail years ahead of schedule.
Indoor Comfort: Proper maintenance keeps your heat pump maintaining even temperatures and reliable humidity control through every season.
Warranty Protection: Many manufacturers require documented proof of professional maintenance to honor warranty claims. Skipping service can void coverage exactly when you need it most.
Lower Repair Costs: Catching small problems early prevents them from becoming large, expensive emergencies.
How Often Should You Schedule Heat Pump Maintenance?
The short answer: twice a year. Because heat pumps run through both the heating and cooling seasons, they need more frequent professional attention than seasonal-only systems.
The Recommended Heat Pump Maintenance Schedule
Task
Frequency
Who Does It
Professional tune-up
Twice per year (spring and fall)
Licensed HVAC technician
Filter cleaning or replacement
Every 1 to 3 months
Homeowner
Outdoor unit inspection and clearing
Monthly
Homeowner
Thermostat check and calibration
Seasonally
Homeowner or technician
Coil cleaning and refrigerant check
Annually (included in tune-up)
Licensed HVAC technician
Why Twice a Year for Heat Pump Maintenance?
Unlike a furnace that earns a single pre-winter tune-up, your heat pump works double duty all year. A spring visit preps it for long cooling cycles during Indiana’s hot, humid summers. A fall visit ensures reliable heat production before cold weather sets in. Skipping either appointment leaves your system vulnerable during peak demand, when breakdowns are most disruptive and service appointments are hardest to get.
Scheduling both visits in advance through a Schneider service agreement is the easiest way to stay on track without having to remember to call each season.
What a Professional Heat Pump Tune-Up Includes
A professional maintenance visit is far more thorough than a quick visual inspection. Technicians inspect, clean, test, and adjust key components to ensure the system is operating as efficiently and safely as possible.
Filter Service and Refrigerant Inspection
A clogged air filter is one of the leading causes of reduced airflow and elevated energy consumption. During your tune-up, the technician will clean or replace the filter and verify airflow is unrestricted throughout the system.
Refrigerant levels are checked and corrected as needed. Too little refrigerant prevents effective heat transfer and can damage the compressor over time. Too much creates dangerous pressure levels that stress components and shorten system life.
Electrical and Mechanical Component Checks
The technician will test and tighten all electrical connections, inspect capacitors, contactors, and relays, lubricate moving parts, and verify that safety controls and emergency shutoffs function correctly. Loose or corroded connections are a common cause of inefficient cycling and, in worse cases, electrical fires.
Coil Cleaning and Heat Transfer Efficiency
Both the indoor evaporator coil and the outdoor condenser coil are inspected and cleaned during a professional heat pump maintenance visit. Dirty coils significantly reduce heat transfer efficiency, forcing the system to run longer cycles and consume more energy to reach the same result.
Defrost Cycle Verification
Indiana winters regularly push temperatures low enough to trigger ice buildup on the outdoor unit. Heat pumps are designed with a defrost cycle to handle this automatically, but a malfunctioning defrost board or sensor can allow ice to accumulate unchecked, damaging the unit. Your technician will verify the defrost cycle engages and completes properly before cold weather arrives.
Thermostat Calibration
A thermostat that reads even a couple of degrees off can cause the system to overshoot or undershoot your comfort targets, wasting energy and creating uneven temperatures. If you are still running a basic thermostat, this is also a good time to discuss the benefits of a smart thermostat upgrade, which can further reduce energy consumption by learning your schedule and adjusting automatically.
What Homeowners Can Do Between Professional Visits
Professional tune-ups are essential, but what you do between appointments also matters. These simple habits extend the life of your system and keep it running efficiently month to month.
Change filters on schedule: Every 1 to 3 months depending on household factors like pets, allergies, and local dust levels. A clogged filter is one of the easiest problems to prevent and one of the most damaging to ignore.
Keep the outdoor unit clear: Maintain at least 18 to 24 inches of clearance around the unit. Remove leaves, grass clippings, and debris regularly. In winter, clear snow and ice buildup carefully without bending the fins.
Clean vents and registers: Blocked supply and return vents restrict airflow and force the system to compensate, consuming more energy and creating uneven comfort.
Monitor thermostat performance: If you notice the system cycling on and off more frequently than usual or struggling to reach the set temperature, that is a signal worth investigating before it becomes a larger repair.
Listen for changes: Unusual sounds like rattling, grinding, or squealing are early warning signs. Catching them early typically means a minor fix rather than a major repair.
Signs Your Heat Pump Needs More Than Routine Maintenance
Sometimes a tune-up reveals a problem that requires more than standard service. Watch for these signs between appointments, as they indicate it is time to call for a repair evaluation rather than waiting for your next scheduled visit:
The system runs constantly but cannot reach the target temperature
Ice forms on the outdoor unit outside of normal defrost cycles
Unusual noises persist after a recent service visit
Energy bills spike without a change in usage habits
The system blows air that is not noticeably warmer or cooler than room temperature
Refrigerant lines show visible frost or the unit emits a chemical odor
If any of these apply to your system, heat pump repair in Seymour should be scheduled promptly. Delaying often turns a straightforward fix into a more costly one.
The Cost of Skipping Heat Pump Maintenance
Skipping a service appointment when the system seems to be working is a common and costly mistake. Here is what you are risking:
Higher monthly energy bills: Even a modest efficiency loss from dirty coils or low refrigerant can add hundreds of dollars annually to your utility costs.
Emergency repair costs: Repairs needed during peak summer or winter demand are more expensive and often involve longer wait times for parts and service.
Shortened system life: A heat pump that should last 15 years may fail at 8 to 10 without consistent care, forcing an early replacement investment.
Voided warranties: Most manufacturers require documented proof of biannual professional maintenance to honor parts and labor warranty claims.
The cost of a professional tune-up is modest compared to any of these outcomes. Viewed as a recurring investment, routine HVAC maintenance in Seymour consistently delivers a positive return.
Heat Pump Maintenance vs Maintenance Plan: Which Makes More Sense?
Scheduling individual tune-up appointments each spring and fall works, but a maintenance plan takes the guesswork out entirely. With a service agreement, your visits are scheduled automatically, you receive priority booking during busy seasons, and many plans include discounts on parts and labor if a repair is needed during the covered period.
For homeowners who want consistent protection without having to remember to call twice a year, a Schneider service agreement is worth a close look. It is the simplest way to ensure your heat pump never misses a scheduled service.
Indiana Climate and Your Heat Pump: What Makes This Area Different
Heat pumps in southern Indiana face demands that are tougher than many other regions. Jackson and Jennings County summers bring heat and humidity that push cooling systems hard from June through August. Winters, while not extreme, regularly dip into temperatures where heat pump efficiency drops and backup heat sources may engage.
This climate reality makes the twice-yearly maintenance schedule even more important here than in milder regions. Spring service after a cold winter ensures the refrigerant, coils, and electrical components are in full working order before the summer cooling load begins. Fall service after months of cooling duty catches wear before the heating season demands begin. The U.S. Department of Energy recommends professional annual or biannual service for all heat pump systems, a recommendation that makes particular sense in climates with distinct heating and cooling seasons like Indiana’s.
If you are still weighing whether a heat pump is the right long-term investment for your home, our overview of heat pump installation in Seymour covers what to expect from the process and which system configurations work best in this area.
Frequently Asked Questions: Heat Pump Maintenance
How often should heat pump maintenance be scheduled?
Twice per year is the professional standard for heat pumps. Schedule one visit in spring before the cooling season begins and one in fall before heating season. Because heat pumps run year-round, they need more frequent service than furnaces or central air conditioners that only operate one season.
What happens if I skip heat pump maintenance?
Skipping maintenance increases the risk of reduced efficiency, higher energy bills, unexpected breakdowns, and a shorter overall system lifespan. Many manufacturers also require documented professional service to keep warranty coverage valid. A single missed tune-up may seem harmless, but the cumulative effect of inconsistent maintenance is measurable over time.
How long does a heat pump tune-up take?
Most professional heat pump maintenance visits take between 60 and 90 minutes for a standard system. More complex systems or units that have not been serviced in more than a year may take longer if additional cleaning or adjustments are needed.
Can I do heat pump maintenance myself?
Homeowners can handle filter changes, outdoor unit clearing, and basic visual checks. However, tasks like refrigerant level checks, coil cleaning, electrical testing, and defrost cycle verification require licensed technicians with the proper tools and certifications. Attempting refrigerant work without an EPA 608 certification is illegal.
How do I know if my heat pump needs repairs instead of just maintenance?
If your system is struggling to reach temperature, making unusual noises, showing ice buildup outside of normal defrost cycles, or driving up energy bills without explanation, those are signals for repair rather than routine maintenance. Schedule a diagnostic visit with our team for heat pump repair in Seymour rather than waiting for the next tune-up date.
Is a maintenance plan worth it for a heat pump?
For most homeowners, yes. A maintenance plan removes the burden of remembering to call twice a year, guarantees priority scheduling during busy seasons, and often includes repair discounts that more than offset the plan cost. Review the Schneider service agreement options to find the right fit for your home.
Keep Your Heat Pump Ready for Every Season
Your heat pump works year-round to keep your home comfortable, and it deserves consistent care in return. Two professional visits per year, combined with basic homeowner upkeep between appointments, is all it takes to protect your investment and avoid the stress of an unexpected breakdown.
Schneider Plumbing, Heating & Air Conditioning has served homeowners throughout Jackson and Jennings County for over 70 years. Our licensed technicians know heat pump systems inside and out and will make sure yours is ready for whatever the Indiana weather brings next.
Contact us today to schedule your next heat pump maintenance visit or to ask about our service agreement options.
Toilet issues can range from mildly annoying to outright disruptive, and knowing when to call for toilet repair services can save you time, money, and a major mess. While some minor toilet troubles can be fixed with a plunger or wrench, others signal deeper issues requiring a professional plumber’s expertise.
Common Toilet Issues That Need Repair
Toilets are among the most used plumbing fixtures in any home, and wear and tear is inevitable. While some issues are purely cosmetic or temporarily inconvenient, others may indicate serious plumbing problems.
Constant Running or Leaking
One of the most common issues homeowners face is a toilet that runs continuously or leaks around the base or tank. A constantly running toilet can waste hundreds of gallons of water each month, driving up your utility bill and impacting your environmental footprint. The usual culprits include:
Worn-out flapper: This rubber piece can degrade over time, failing to create a proper seal.
Faulty fill valve: If it’s not shutting off correctly, the tank will keep refilling.
Chain or handle issues: A kinked chain or a stuck handle may prevent the flapper from closing fully.
In some cases, these components can be replaced easily. However, if you’ve tried swapping them out and the toilet still runs, more complex internal tank problems or water pressure issues may need a professional’s diagnosis.
Leaking toilets are a different beast. Water pooling around the base could signal:
A cracked wax seal between the toilet and floor
A loose flange
A hairline crack in the bowl or tank
Leaks like these can lead to mold, mildew, and subfloor damage, so it’s crucial to call a plumber as soon as you notice them.
Cracked Porcelain and Clogs
Cracks in the porcelain bowl or tank may start out small but can quickly escalate. A hairline crack can lead to slow leaks or a sudden catastrophic failure. These cracks often appear due to:
Age and wear
Impact (dropping something heavy on the toilet)
Extreme temperature changes
Cracks are not repairable. Once the integrity of the porcelain is compromised, replacement is the only safe option—and it’s definitely not a DIY task.
Clogs, on the other hand, are common but vary in severity. A plunger can often clear minor clogs from toilet paper or organic material. However, persistent or recurring clogs may indicate:
Something lodged in the trap (e.g., toys, wipes, hygiene products)
Hard water buildup
Tree roots invading the sewer line
If you find yourself plunging more than once a week or if other drains in your home are backing up simultaneously, it’s time to call in a professional plumber who can inspect your lines and use tools like augers or hydro-jetting.
Replacing Valves and Seals
Your toilet relies on a variety of valves and seals to function correctly. Over time, these parts can wear out due to:
Hard water minerals
Age
Improper installation
Key parts that may need a professional replacement include:
Fill valve: Controls the water level in the tank.
Flush valve: Releases water from the tank into the bowl.
Wax seal: Provides a watertight barrier between the base of the toilet and the floor.
Tank-to-bowl gasket: Prevents leaks where the two parts connect.
Replacing these parts may seem simple, but it often involves turning off the water supply, draining the tank, disconnecting plumbing lines, and reseating or realigning components properly. One wrong move could lead to leaks or even water damage.
DIY vs. Professional Toilet Fixes
There’s nothing wrong with being a handy homeowner—many toilet issues can be fixed with a few basic tools and parts from the hardware store. But how do you know when it’s time to stop DIYing and call in the professionals?
When DIY Might Be Enough
Replacing a worn-out flapper or handle
Tightening a loose toilet seat
Adjusting the chain or float in the tank
Plunging a minor clog
These repairs are generally low-risk, cost-effective, and require minimal technical knowledge. Many online tutorials can walk you through the steps.
When to Call for Toilet Repair Services
If you encounter any of the following issues, it’s time to bring in a licensed plumber:
Water pooling around the base or leaking from the tank
Cracks in the bowl or tank
Continuous running despite replacing basic parts
Foul odors coming from the base (could indicate a sewer gas leak)
Backflow or sewer line problems
Persistent or recurring clogs
Weak flushing or strange sounds during flushing
These signs often point to deeper plumbing or structural issues that DIY repairs can’t address. Delaying professional service can lead to increased water bills, property damage, and costly emergency repairs.
Cost and Process of Toilet Repairs
Understanding what to expect during a toilet repair call can help you make informed decisions. Let’s break down both the cost factors and the typical process involved when you contact professionals like Schneider Plumbing, Heating & Air Conditioning.
What Affects the Cost?
Several variables influence the total cost of toilet repairs:
Type of issue: Minor repairs like flapper replacement may cost under $100, while more complex issues like toilet replacement or sewer line repair can range from $200 to $800+.
Parts required: Some replacement parts are inexpensive, while others—such as tank internals or wax seals—require more time and expertise to install.
Extent of damage: Water damage from a leak or a cracked bowl could mean additional remediation work.
Urgency: Emergency or after-hours calls often come with a premium.
Getting a professional inspection and a transparent quote upfront will help prevent any surprises.
What to Expect During a Service Call
Inspection and Diagnosis
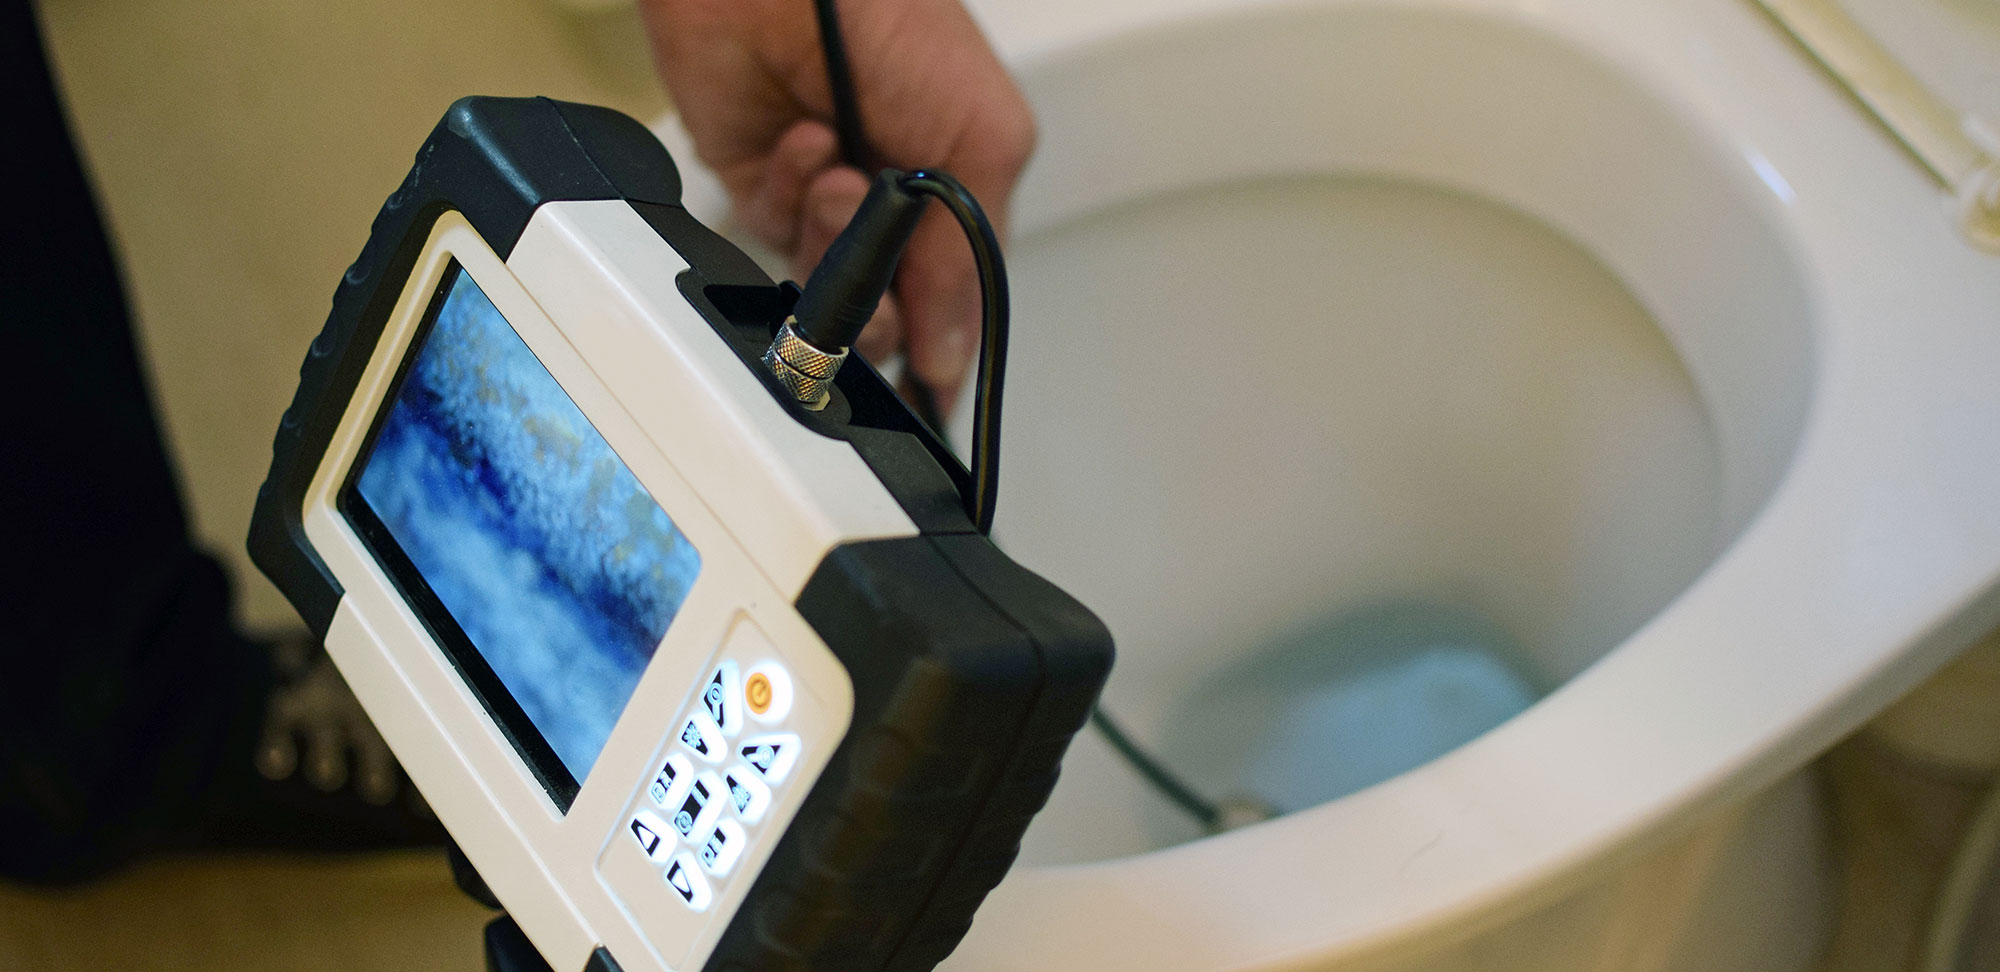
A licensed plumber will examine the toilet and the surrounding area to identify the root cause of the issue. Depending on the problem, they may use dye tests, leak detectors, or inspection cameras.
Quote and Explanation
Once the issue is diagnosed, they’ll explain the problem, outline the needed repair or replacement, and provide an upfront estimate.
Repair or Replacement
Depending on the severity, the plumber may either complete the repair on the spot or schedule a follow-up visit if special parts or tools are required.
Testing and Cleanup
After completing the repair, the technician will test the toilet to ensure it’s functioning properly and clean up the work area.
Working with a reputable company like Schneider Plumbing, Heating & Air Conditioning ensures a professional, respectful experience from start to finish.
Why Choose Schneider Plumbing, Heating & Air Conditioning?
With over 70 years of experience serving Jackson and Jennings County, Schneider Plumbing, Heating & Air Conditioning has earned a reputation for trustworthy and high-quality plumbing services. As a family-owned business, we understand the importance of protecting your home and keeping your family comfortable.
Here’s what sets us apart:
Expert Technicians: Our plumbers are fully licensed, trained, and experienced in all aspects of toilet repair and installation.
Customer-First Service: We prioritize clear communication, honest pricing, and timely service.
Comprehensive Solutions: We handle it all from minor toilet repairs to full bathroom plumbing overhauls.
Emergency Availability: Plumbing issues don’t wait for business hours—and neither does the Schneider team.
Whether you’re dealing with a running toilet, a hidden leak, or a complete replacement, we are ready to help with reliable solutions and top-tier craftsmanship.
Final Thoughts
Toilets are essential to your home’s daily function, and when something goes wrong, prompt action is key. While some simple repairs can be handled on your own, more complex issues like leaks, cracks, or recurring clogs require professional attention. Understanding when to call for toilet repair services not only protects your home from damage but also ensures your plumbing system remains efficient and safe.
Don’t wait for a small problem to become a big one. Contact us today to schedule expert toilet repair services. Proudly serving Jackson and Jennings County for over 70 years, we’re committed to keeping your home’s plumbing—and your life—running smoothly.
Let us help you get back to comfort. Call now to request service.
Flooding and water damage are among the most costly and disruptive problems homeowners face. For those living in areas prone to heavy rainfall, snowmelt, or high groundwater, sump pump installation can be a critical step toward protecting your home’s foundation, belongings, and long-term value. Whether your basement has flooded before or you are taking proactive steps before the next rainy season, understanding when and why to install a sump pump could save you thousands.
What a Sump Pump Does and Why It Matters
A sump pump is a device installed in the lowest point of a basement or crawlspace, typically inside a specially constructed pit called a sump basin. Its job is to collect water that accumulates around your foundation and pump it safely away from the home before it causes damage.
When water rises in the sump pit, whether from heavy rain, snowmelt, or rising groundwater, the pump activates automatically and moves that water to a designated drainage area such as a dry well, storm drain, or municipal sewer. The result is a drier, safer basement without you having to do a thing.
A properly installed sump pump system:
Prevents basement flooding and the property damage that follows
Protects against mold and mildew, which can develop within 24 to 48 hours of water intrusion
Preserves structural integrity by keeping foundation walls consistently dry
Adds measurable value to your home by reducing flood risk for future buyers
Reduces the risk of costly water leak damage going undetected beneath flooring and behind walls
Signs That Sump Pump Installation Is Necessary for Your Home
Most homeowners do not think about sump pumps until water is already on the basement floor. Catching the warning signs early is far less expensive than responding to a flood after the fact.
Your Basement Has a History of Moisture or Flooding
Even a single flood event is a strong signal that your home is vulnerable. But flooding is not the only indicator. Watch for these early warning signs:
Water stains along the base of basement walls or on the floor
Efflorescence, the white chalky residue left behind when water evaporates through concrete
Musty odors that suggest mold or mildew growth behind finished surfaces
Peeling paint, warped paneling, or bubbling drywall
Pooled water during or after heavy rainfall, even if it drains on its own
Any of these signs warrants a professional assessment. In many cases, sump pump installation in Seymour can be scheduled and completed before the next major rain event.
Your Home Is in a Low-Lying or High Water Table Area
Homes in valleys, near rivers or streams, or on soil with poor natural drainage face a higher baseline risk of water intrusion. Indiana’s geography, with its mix of clay-heavy soils and seasonal flooding, makes this a real concern throughout Jackson and Jennings County. If your property sits in a flood zone or has a high water table, a sump pump is not optional, it is essential.
Not sure about your property’s flood risk? The FEMA Flood Map Service Center allows you to look up your address and see your official flood zone designation.
Your Area Gets Frequent or Heavy Storms
Southern Indiana regularly sees intense spring and summer thunderstorms that drop large amounts of rainfall in short windows. When the ground is already saturated, stormwater has nowhere to go but through cracks in your foundation. Even homes that have never flooded can become vulnerable after a series of heavy storms that raise the local water table.
You Are Finishing or Renovating Your Basement
If you are investing money in flooring, drywall, insulation, or electrical work in your basement, protecting that investment should be part of the plan. Even minor water intrusion after a renovation can destroy materials that cost far more to repair than the sump pump would have cost upfront. Installing a sump pump before finishing a basement is standard practice for good reason.
You Recently Purchased a Home Without One
Not all homes come equipped with sump pumps, particularly older construction. If your home inspection flagged moisture concerns or you purchased a home with a basement in a wet climate, adding a sump pump is one of the smartest first investments you can make as a new homeowner.
Sump Pump Installation: Types of Systems and How to Choose
Submersible Sump Pumps
Submersible pumps sit directly inside the sump pit and operate fully submerged during use. They are quieter than pedestal models, handle higher water volumes, and are the preferred choice for homes with serious or recurring flooding. They tend to cost more upfront but offer a longer operating lifespan and greater reliability under heavy demand.
Pedestal Sump Pumps
Pedestal pumps mount above the sump basin with only the intake extending into the pit. They are easier to access for servicing and generally less expensive. They work well in homes with smaller pits or lighter, less frequent water exposure. The motor is exposed above the water line, making it simpler to maintain but slightly louder during operation.
Which Type Is Right for Your Home?
The right choice depends on your sump pit dimensions, the volume of water your basement typically sees, and your budget. A licensed plumber in Seymour can evaluate your specific situation and recommend the correct pump type, motor size, and discharge setup to keep your basement dry in even the worst conditions.
Battery Backup Systems: Why They Matter More Than You Think
Here is a scenario that plays out regularly during Indiana storms: the power goes out at the exact moment your basement needs the sump pump most. Without a battery backup, the pump is useless during the outage, and water rises unchecked.
A battery backup sump pump system automatically activates when the primary pump loses power, providing continuous protection even during extended outages. Some systems include smart monitoring that sends alerts to your phone if the backup engages or if battery levels drop. For a detailed look at what backup systems cost and which options offer the best value, see our breakdown of sump pump battery backup costs.
Adding a battery backup at the time of initial installation is almost always less expensive than retrofitting one later.
Sump Pump Installation Cost: What to Expect
Professional sump pump installation including parts and labor typically runs between $1,000 and $3,000 depending on:
Cost Factor
Low End
High End
Pedestal pump (parts + labor)
$500
$1,200
Submersible pump (parts + labor)
$800
$2,000
Battery backup system
$300
$1,000
Sump pit excavation (new install)
$500
$1,500
Discharge line extension
$100
$500
To put this in perspective: a single basement flood averages $10,000 to $30,000 in water damage repairs according to industry estimates. A properly installed sump pump system is one of the highest-return protective investments a homeowner can make.
The Professional Installation Process: Step by Step
Sump pump installation is not a DIY project. Proper installation requires an understanding of soil conditions, local water table behavior, building codes, and electrical safety. Here is what professional installation typically involves:
Site Assessment: Evaluating your basement or crawlspace to identify the lowest point and best sump pit location relative to your drainage needs.
Pit Excavation: Digging the sump basin and setting up gravel bed and drainage tile if needed.
Pump and Basin Installation: Setting the pump, liner, discharge line, and check valve to prevent backflow.
Electrical Connection: Connecting the pump to a dedicated circuit with GFCI protection and installing battery backup wiring if applicable.
Testing and Verification: Running the system through multiple cycles and confirming the discharge line routes water well away from the foundation.
Errors during any of these steps can result in a pump that fails when you need it most or one that discharges water back toward the home. Always use a licensed professional for this work.
How Long Does a Sump Pump Last?
The average sump pump lasts 7 to 10 years with regular maintenance. Submersible models may reach the lower end of that range due to constant submersion, while pedestal models in lighter-use situations can exceed 10 years. Signs your existing pump may be nearing the end of its useful life include:
Unusual noises such as rattling, grinding, or excessive vibration
Running continuously without shutting off
Visible rust or corrosion on the pump body or pit liner
Slow or inconsistent water removal
The system is 7 or more years old and has never been serviced
If your pump is showing any of these signs, do not wait for a flood to confirm the failure. Proactive replacement before storm season is far less stressful and less expensive than an emergency call in the middle of the night.
Sump Pump Maintenance: Keeping Your System Ready Year-Round
Installing a sump pump is only part of the equation. Regular maintenance ensures it performs when conditions demand it most.
Test it quarterly: Pour a bucket of water into the pit and confirm the float activates the pump and the water discharges properly.
Clean the pit annually: Remove debris, gravel, and sediment that can clog the intake screen.
Inspect the discharge line: Make sure the outlet is clear of ice in winter and that water is directed well away from the foundation.
Check the battery backup: Test backup battery charge and replace the battery every 3 to 5 years even if it appears functional.
Schedule professional service: An annual inspection by a local plumber in Seymour catches issues before they become failures.
When Is the Best Time to Schedule Sump Pump Installation?
The best time to install a sump pump is before you need it. Specifically, consider scheduling installation:
Before spring thaw and Indiana’s peak rainy season (March through June)
Before finishing or renovating a basement space
Shortly after purchasing a home that lacks an existing system
After noticing any signs of moisture, even if flooding has not occurred yet
When replacing an aging pump that is 7 or more years old
Emergency installations during an active flood are possible but cost more, take longer, and often cause unnecessary stress. Planning ahead gives you time to choose the right system and get the job done properly.
Is sump pump installation necessary if my basement has never flooded?
Yes, in many cases. A basement that has never flooded may still be at risk due to soil type, proximity to water sources, or aging foundation waterproofing. A sump pump acts as insurance against future water intrusion. An inspection by a sump pump installation professional in Seymour can help you assess your actual risk level.
How deep does a sump pit need to be?
Most sump pits are dug to a depth of 18 to 24 inches and measure roughly 18 inches in diameter, though the exact dimensions depend on your water volume and pump type. Your installer will size the pit based on a site assessment rather than a one-size-fits-all spec.
Can I install a sump pump myself?
Technically yes, but it is not recommended. Improper pit sizing, incorrect float settings, poor discharge routing, or faulty electrical connections can all result in a system that fails at the worst possible moment. Licensed installation ensures the job meets local code and the system performs as intended.
What happens if the power goes out during a storm?
Without a battery backup, your sump pump will not operate during a power outage. Since outages frequently accompany the same storms that stress your drainage system most, a battery backup is a critical companion to any primary sump pump. Review your backup options in our guide to sump pump battery backup costs.
Does homeowners insurance cover sump pump failure?
Standard homeowners insurance typically does not cover damage from sump pump failure or basement flooding. You may be able to add a water backup endorsement to your policy for an additional premium. Check with your insurance provider for details specific to your coverage.
How long does sump pump installation take?
For a straightforward replacement of an existing pump in an already-established pit, installation typically takes 2 to 4 hours. New installations requiring pit excavation may take a full day. Your contractor can give you a firm timeline during the assessment.
Protect Your Home Before the Next Storm
Water damage can be devastating, but with the right protection in place, your home’s foundation and lower level can stay dry through whatever Indiana weather brings. Schneider Plumbing, Heating & Air Conditioning has been protecting homes throughout Jackson and Jennings County for over 70 years. Our licensed team will assess your basement, recommend the right system, and install it to last.
Do not wait until you are standing in water to make the call. Contact us today for a professional assessment and a solution built around your home’s specific needs.
If you’ve ever wondered, “Why is my garbage disposal not working properly?” You’re certainly not alone. Garbage disposal repair is a common household concern. This small but mighty appliance handles a lot of mess and waste, and when it stops working efficiently—or worse, stops working at all—it can create serious inconvenience in your daily kitchen routine.
Understanding the common issues behind disposal malfunctions, learning when to try a DIY fix, and knowing when to call in a pro can save you time, money, and stress.
Common Garbage Disposal Problems
Garbage disposals may seem like simple devices, but several things can go wrong with them, especially as they age or are used improperly.
Strange Noises and Leaks
One of the first signs something’s off is strange sounds—metallic clanking, humming, or grinding noises that weren’t there before. These usually indicate that:
A foreign object (like a spoon or bottle cap) has fallen into the disposal.
Internal parts, such as impellers or blades, are damaged or loose.
The motor is trying to run but is jammed.
If your disposal is leaking, the culprit could be:
A loose sink flange (where the unit connects to the sink)
A cracked or corroded housing
Leaky drain or dishwasher connection hoses
Leaks should be addressed quickly to avoid water damage beneath your sink.
The Disposal Won’t Turn On
If the disposal doesn’t turn on at all—no noise, no hum—it may not be receiving power. Check:
If it’s plugged in (easy but often overlooked)
Your circuit breaker
The unit’s built-in reset button
If none of these solves the problem, the motor may have burned out, or the internal wiring may be faulty.
Disposal Hums but Doesn’t Grind
This is typically a jammed flywheel or impeller. When something gets stuck, and the motor can’t spin, you may hear a humming sound, followed by the unit shutting off after a few seconds. It’s a safety feature to prevent burnout.
Never continue to run a humming disposal—it could overheat the motor or trip your breaker.
DIY Fixes vs. Professional Repair
Not all garbage disposal issues require a service call. But some do. Knowing where to draw the line is key to fixing problems quickly and safely.
Resetting the Unit Safely
Most disposals have a small red or black reset button on the bottom. If your unit suddenly stops working, try this:
Turn off the disposal and unplug it.
Check inside the chamber for jams (using tongs or pliers—never your hand).
Press the reset button.
Plug it back in and test it.
If the unit powers back on, it likely shut down to prevent damage. If not, it might be an electrical or motor issue that needs attention.
Unjamming a Stuck Disposal
If your disposal hums but doesn’t spin, it could be jammed. Here’s a DIY method:
Turn off the power to the unit.
Use a disposal wrench or hex key (usually ¼ inch) to manually rotate the impeller by inserting the tool into the bottom center socket.
Wiggle it back and forth to dislodge the jam.
Try running the disposal again.
If this doesn’t work—or if you hear grinding or metal-on-metal noises—stop and call a professional to avoid further damage.
When to Call a Professional
It’s time to bring in the experts if:
You smell burning or see smoke
The disposal trips the breaker repeatedly
Leaks appear in hard-to-reach or corroded areas
The unit grinds slowly, even when not jammed
You’ve tried a reset and manual unjam, but nothing changes
Professional plumbers have the tools and expertise to handle internal repairs, leaks, and electrical issues safely and efficiently. They can also advise if your disposal is nearing the end of its life and should be replaced.
Preventing Future Disposal Issues
A properly used and maintained garbage disposal should last 8–15 years. Here’s how to get the most out of yours.
Foods You Should Never Put Down
Despite the name, a garbage disposal isn’t a catch-all waste chute. It’s designed to handle small food scraps, not everything from your plate. Avoid putting these items into your disposal:
Fibrous foods: Celery, corn husks, onion skins—these wrap around blades.
Starchy foods: Pasta, rice, and potato peels swell with water and cause clogs.
Bones and shells: These are too hard and can damage internal components.
Grease and oil: They cool into a sticky sludge that clogs pipes.
Coffee grounds: They clump together in the drain.
Eggshells: Often believed to sharpen blades (a myth), they actually gum up the works.
When in doubt, throw it out.
Run Water Before and After Use
Always run cold water before turning on the disposal and continue running water for 15–30 seconds afterward. This helps:
Flush debris through the drain
Prevent food bits from building up
Keep fats from solidifying
Cold water is preferred because it keeps grease in solid form, allowing it to break up and flush through instead of coating your pipes.
Clean It Regularly
To eliminate odors and keep your disposal fresh:
Toss in a few ice cubes and citrus peels once a week.
Sprinkle baking soda and vinegar inside, let it sit, and flush with hot water.
Use a disposal cleaning brush or sponge wand to scrub under the rubber splash guard (where gunk often hides).
These habits reduce bacteria, sludge buildup, and unpleasant smells.
Inspect for Wear and Tear
Over time, your disposal may show signs of wear:
Blades dull or corrode
Seals weaken
Housing cracks
If you hear unusual noises or see leaks, it may be time for an inspection—even if the issue seems minor. Catching these issues early can prevent expensive repairs later.
Reliable Help Is Just a Call Away
If your garbage disposal isn’t working properly, don’t wait for a minor inconvenience to become a major plumbing disaster. Whether it’s a jammed impeller, a leaking flange, or a dead motor, the team at Schneider Plumbing, Heating & Air Conditioning is ready to help.
With over 70 years of service in Jackson and Jennings County, our family-owned business is committed to keeping your home comfortable, safe, and running smoothly. We specialize in plumbing, heating, and cooling services that prioritize quality, professionalism, and long-term reliability.
Our licensed plumbers have the experience and tools needed to:
Diagnose and fix garbage disposal issues
Perform expert installations and replacements
Offer maintenance advice to keep your unit working properly
Don’t let a faulty disposal disrupt your kitchen. Call us today to schedule a service. Your comfort is our mission, and your satisfaction is our guarantee.