When drains slow down or back up, homeowners often find themselves choosing between two popular cleaning methods: hydro jetting vs snaking. Both approaches are used by professional plumbers to remove clogs and buildup, but they work in very different ways. Understanding how each method operates, its costs, and when they’re most effective can help you make the right decision for your plumbing system. Whether you’re dealing with grease buildup in the kitchen sink, tree roots in a main line, or recurring slow drains, knowing the difference between hydro jetting and snaking could save you time, money, and frustration.
Hydro Jetting vs Snaking: How Each Method Works
Before deciding which service you need, it’s important to understand the mechanics behind hydro jetting and snaking. Each technique targets clogs differently and offers distinct advantages based on the type of blockage.
How Drain Snaking Works
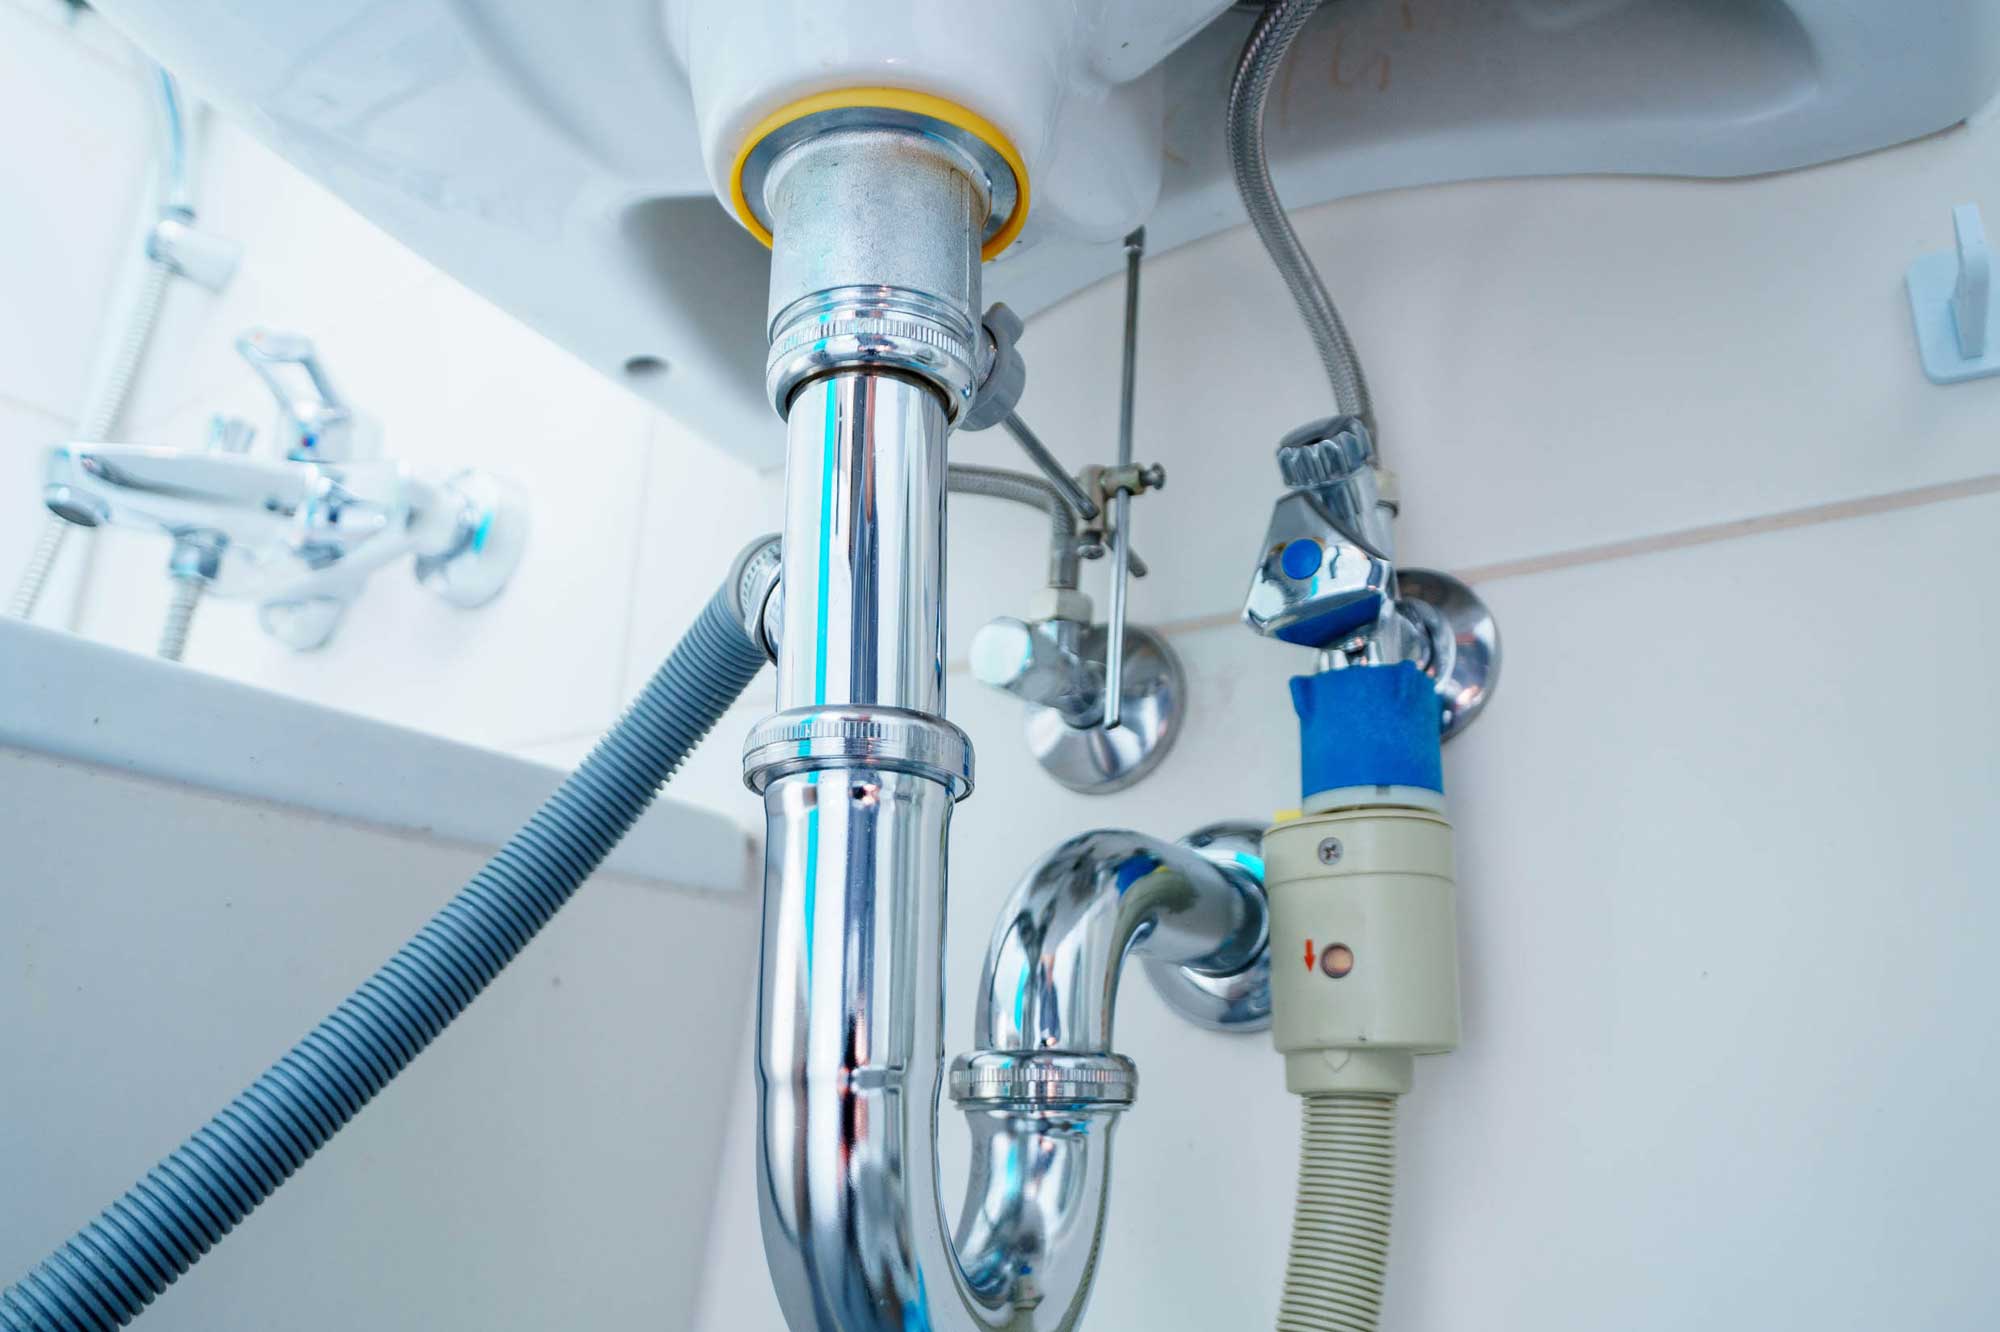
A drain snake, also known as an auger, is a flexible metal cable with a coiled tip that plumbers feed into a pipe. When the cable reaches the clog, it’s rotated to break up or hook onto the blockage so it can be pulled out or pushed through the line. Snakes come in various sizes, from small hand-cranked versions for sinks and tubs to motorized augers designed for larger drains and main sewer lines.
Snaking is ideal for clearing simple obstructions like hair, paper, or soft debris. However, while it can restore flow, it doesn’t always clean the pipe walls completely. Some residue, especially from grease or mineral deposits, may remain and cause future clogs.
How Hydro Jetting Works
Hydro jetting is a more advanced drain-cleaning method that uses high-pressure water to blast away buildup inside pipes. A hose equipped with a specialized nozzle is inserted into the line, releasing water at pressures ranging from 1,500 to 4,000 PSI or more. The force of the water scours the entire interior of the pipe, removing grease, scale, roots, and debris.
Unlike snaking, hydro jetting doesn’t just poke through a clog; it cleans the pipe walls back to their original diameter. It’s an environmentally friendly method because it relies solely on water pressure instead of chemicals or abrasives. This deep-cleaning process helps prevent future blockages and is often recommended as part of long-term plumbing maintenance.
Hydro Jetting vs Snaking for Grease, Scale, and Roots
Different types of clogs call for different solutions. While both snaking and hydro jetting can clear blockages, their effectiveness varies depending on what’s inside your pipes.
Grease Buildup: Snaking can temporarily relieve grease-related clogs by pushing a hole through the buildup. However, since grease coats the interior of pipes, the problem usually returns. Hydro jetting is far more effective for grease because the high-pressure water scrubs away residue along the entire length of the pipe, restoring full flow.
Scale and Mineral Deposits: Over time, minerals in hard water can accumulate and narrow pipe openings. A snake can’t effectively remove these hardened deposits. Hydro jetting, however, can break them loose and flush them out, improving both drainage and water pressure.
Tree Roots: For outdoor sewer lines, tree roots are a common issue. A drain snake fitted with a cutting attachment can slice through small roots, but it won’t remove them entirely. Hydro jetting, when used carefully, can cut through roots and wash away the debris, keeping the line clear longer. However, if the roots have already damaged the pipe, a camera inspection and repair may be necessary before jetting.
Pipe Materials and Safety: Will Jetting Damage Lines?
One of the most common concerns homeowners have about hydro jetting is whether it can damage their plumbing. The answer depends on the condition and material of your pipes.
Hydro jetting is generally safe for most modern plumbing systems, including PVC, copper, and cast iron pipes, when performed by trained professionals. Experienced plumbers use camera inspections to assess pipe health and adjust the water pressure accordingly. For example, older or corroded pipes may not withstand extremely high pressure, so a lower PSI is used to prevent damage.
Snaking, by contrast, poses minimal risk to pipe integrity since it relies on mechanical movement rather than pressure. However, if used improperly, a snake can still scratch or puncture older, fragile lines, especially clay or thin metal pipes. The key to avoiding damage with either method is professional assessment and correct equipment use.
Signs You Need a Camera Inspection Before Cleaning
Before hydro jetting or snaking a drain, a video camera inspection can be invaluable. This process involves inserting a small waterproof camera into the pipe to pinpoint the exact location and cause of the blockage. Here’s when an inspection is especially recommended:
Frequent Clogs or Backups: If drains keep clogging after being snaked, the issue could be deeper, such as root intrusion or a collapsed pipe.
Older Plumbing Systems: Aging pipes made of clay, galvanized steel, or Orangeburg (tar paper) are more susceptible to damage.
Slow Drains Throughout the House: This often points to a main sewer line issue rather than a single fixture clog.
Sewage Odors or Gurgling Sounds: These signs suggest a partial blockage or ventilation issue in the drain system.
A camera inspection provides a clear view of the problem, allowing your plumber to choose the safest and most effective method for cleaning. It also ensures that hydro jetting won’t cause further damage if the pipes are already compromised.
Hydro Jetting vs Snaking Costs & When Each Makes Sense
When comparing hydro jetting vs snaking, cost often plays a big role in choosing between the two. Both have their place depending on the severity and location of the clog, but the long-term value can differ.
Cost of Snaking
The average cost of drain snaking ranges from $150 to $350, depending on the location of the clog and accessibility. A simple sink or tub drain might fall on the lower end, while a main sewer line could cost more. Snaking is typically the first choice for minor clogs because it’s fast, effective, and budget-friendly.
However, while it’s affordable upfront, snaking often provides only a temporary fix. If grease or buildup is left behind, repeated service calls can add up over time.
Cost of Hydro Jetting
Hydro jetting generally costs between $350 and $600 for residential plumbing, with more extensive jobs, such as long sewer lines or severe blockages, reaching up to $1,000 or more. The higher cost reflects the specialized equipment and expertise required, but it often delivers a more lasting solution.
Because hydro jetting thoroughly cleans pipes, homeowners who invest in this service typically enjoy longer-lasting results and fewer clogs in the future. This makes it a better value for those with ongoing drain issues or commercial properties with high usage.
When Snaking Makes Sense
Minor or isolated clogs (like hair in a bathroom drain)
First-time blockages without recurring issues
Older or fragile pipes that may not handle high pressure
Quick, low-cost repairs for occasional maintenance
Snaking is a reliable go-to for small, localized problems and can often restore flow in minutes.
When Hydro Jetting Makes Sense
Recurring or severe clogs caused by grease, sludge, or roots
Commercial kitchens or restaurants that experience heavy grease buildup
Homes with large drain systems or multiple slow drains
Preventive maintenance for older sewer lines
Hydro jetting is best suited for deep cleaning and long-term performance. It’s also the preferred option when you want to prevent future blockages, not just remove existing ones.
Preventing Future Clogs: Maintenance Plans That Work
Whether you choose hydro jetting or snaking, the best way to keep your drains clear is through routine maintenance. Preventive care can extend the lifespan of your plumbing and save you from costly emergency repairs.
Regular Professional Cleaning
Having a professional plumber perform regular drain cleaning can prevent buildup before it turns into a clog. For most homes, annual or biennial maintenance is sufficient, while commercial properties may require more frequent service. A plumber can alternate between snaking and hydro jetting depending on the system’s condition, ensuring your pipes stay in top shape year-round.
Safe Everyday Habits
Simple habits can make a big difference in preventing clogs:
Avoid pouring grease, oil, or fat down the drain. These substances solidify and trap debris.
Use drain strainers to catch hair and food particles before they enter the pipes.
Flush drains periodically with hot water to help dissolve minor buildup.
Avoid chemical drain cleaners, which can corrode pipes and damage seals over time.
Consistent prevention minimizes the need for emergency calls and helps your plumbing system run more efficiently.
Preventive Hydro Jetting for Long-Term Health
Many homeowners are now choosing preventive hydro jetting every few years, especially if they live in older homes or areas with hard water. This process eliminates grease, scale, and sediment before they cause major issues. Think of it as a full-system flush for your plumbing; it keeps everything flowing freely and reduces stress on your pipes and fixtures.
Working With a Trusted Plumbing Partner
Ultimately, choosing between hydro jetting and snaking isn’t a one-size-fits-all decision. It’s about understanding your system’s unique needs. Partnering with an experienced plumbing company ensures you get the right solution every time. A licensed professional can inspect your lines, explain your options, and recommend the safest and most cost-effective path forward.
Call the Experts at Schneider Plumbing, Heating & Air Conditioning
If you’re unsure which drain cleaning method is right for your home, the experts at Schneider Plumbing, Heating & Air Conditioning can help. For over 70 years, our family-owned team has proudly served residents throughout Jackson and Jennings County, providing reliable plumbing, heating, and cooling services. We combine cutting-edge technology with time-tested experience to deliver solutions that last.
Whether you’re dealing with a stubborn clog or simply want to prevent future plumbing issues, we’ll perform a full inspection and recommend the best approach, whether that’s hydro jetting, snaking, or another specialized service. Our goal is to restore your comfort quickly, safely, and affordably.
Don’t wait for a small clog to turn into a costly plumbing emergency. Contact us today to schedule your drain cleaning service.
When a pipe bursts or a drain backs up at midnight, you don’t have time to wait until morning. You need help fast, but how much does an emergency plumber cost? The short answer is that the total can vary based on when you call, where you live, what’s broken, and what parts are needed. The long answer involves understanding the unique components that make up emergency plumbing pricing, and how you can keep costs under control while protecting your home from damage.
Below, we’ll explore the biggest factors that influence after-hours plumbing costs, what you can do before the technician arrives, and smart ways to avoid paying premium rates.
Most plumbing companies keep standard service hours, typically 8 a.m. to 5 p.m. Monday through Friday. When you call outside that window, on weekends, holidays, or overnight, your plumber may charge an after-hours or emergency fee. These fees compensate technicians for being available 24/7 and cover the extra logistics of dispatching help outside normal business operations.
After-Hours Fees and Minimum Charges
An emergency service fee is often added to your regular labor charge. In many areas, this fee ranges between $70 and $200, though rates can vary depending on location and urgency. Some companies also set a minimum service charge for emergency calls, meaning even a quick fix has a baseline cost.
For example, if a plumber’s standard hourly rate is $125, a weekend emergency call might cost $250 or more for the first hour, with additional hours billed at a reduced rate.
Holiday and Weekend Premiums
Plumbing emergencies don’t take holidays off, and neither do the professionals who respond to them. Calls on holidays like Thanksgiving, Christmas, or New Year’s Day often include an additional premium, sometimes 1.5 to 2 times the regular rate.
If possible, and if your situation isn’t causing active flooding or safety hazards, waiting until business hours may save you hundreds. We’ll cover when it’s safe to wait in the next section.
Emergency Plumber Cost vs. Scheduled Service: When to Wait
Some issues feel urgent but aren’t true emergencies. Understanding the difference can help you decide whether to call right away or schedule a next-day appointment at standard rates.
Emergency issues that require immediate attention include:
A burst or leaking pipe you can’t stop with a shutoff valve
A sewage backup or major toilet overflow
No running water in the home
Gas or water heater leaks posing safety risks
Issues that can often wait until morning include:
Slow drains or minor clogs
Small, contained leaks under a sink
A malfunctioning garbage disposal
Routine fixture replacements
If you can safely stop the water flow or isolate the affected area, scheduling a standard appointment instead of an emergency visit can significantly reduce your final bill.
Once a technician arrives, several other cost components influence your total. Every plumbing job is unique, and the price reflects both the complexity of the issue and the resources required to fix it.
Type and Severity of the Problem
A small leak at a faucet connection may take 30 minutes to fix, while a burst main line under your home could take hours. The scope of repair is the single biggest driver of cost. Common emergency plumbing scenarios include:
Pipe bursts: $150–$1,000+ depending on location and pipe material.
Sewer line blockages: $200–$500 for snaking; more for camera inspections or hydro-jetting.
Water heater leaks: $150–$800, depending on whether repair or replacement is required.
Toilet or drain overflows: $125–$300 depending on complexity and cleanup.
The more labor-intensive or invasive the repair, the higher the total cost.
Parts and Replacement Materials
Emergency repairs often require immediate access to replacement parts, such as valves, seals, couplings, or new sections of pipe. If your plumber must source specialty parts after hours or make a return trip, that adds both material and labor costs.
In some cases, the technician may temporarily patch or bypass the issue to restore service, then return during regular hours to perform a full repair at a lower rate.
Travel Time and Service Area
Many plumbers charge travel fees or mileage outside a standard service radius. This helps cover fuel, vehicle wear, and the time spent commuting to your location. Rural homeowners or those in outlying areas may see slightly higher bills than those in town centers.
If you live in a remote area, you can often minimize travel-related fees by calling a local provider instead of a regional chain. Local, family-owned companies, like Schneider Plumbing, Heating & Air Conditioning, typically maintain better availability and lower travel costs for nearby residents.
What to Do Before the Tech Arrives (Damage Control)
Even if you’ve already called for help, there’s plenty you can do to control damage and protect your home before your plumber arrives. A few quick steps can prevent hundreds or even thousands in additional repairs.
Shut Off the Water
Locate your main shutoff valve, usually found near the water meter, basement, or where the main line enters your home. Turn the handle clockwise to stop the water flow. For smaller leaks, you can also close localized shutoff valves near sinks, toilets, and appliances.
If you’re unsure where your shutoff is, look for it before an emergency strikes. Labeling it for future use is a small but smart safety measure.
Turn Off the Water Heater
If you’ve shut off the main water supply, it’s a good idea to turn off your water heater as well. This prevents heat from building up inside an empty tank, which can cause damage. For gas models, turn the dial to “pilot.” For electric, switch off the breaker in your electrical panel.
Contain and Clean Up Leaks
Use buckets, towels, or mops to control standing water. Dry affected areas as best you can to prevent mold growth and damage to flooring or drywall. If water is coming through the ceiling, place a bucket underneath and puncture a small hole at the lowest point to relieve pressure and prevent the ceiling from collapsing.
Document the Damage
If your plumbing emergency caused property damage, take photos before cleanup for insurance purposes. Having clear evidence of the incident can simplify claims later.
Memberships, Coupons, and Financing Options
Nobody wants to face an unexpected plumbing bill, especially during an emergency. The good news is that many plumbing companies offer discount programs, service memberships, or financing options to make costs more manageable.
Maintenance Memberships
A plumbing or HVAC membership plan can be a lifesaver. For an annual fee, you typically receive priority scheduling, discounted rates, and free or low-cost inspections. Regular maintenance helps catch problems early, reducing the risk of future emergencies.
Members often pay less for after-hours service or avoid emergency fees altogether, depending on the plan.
Seasonal Coupons and Promotions
Before calling, check the company’s website or social media for coupons or limited-time offers. Many local plumbers post deals for first-time customers, veterans, or seniors.
A five-minute search could save you a significant amount on your service call.
Financing Large Repairs
Major plumbing issues like water heater replacements or sewer line repairs can cost thousands. If the work can’t wait, ask about financing options. Many reputable companies partner with lenders to offer payment plans with low or no interest for qualifying customers.
This flexibility allows you to address urgent repairs without straining your budget.
How to Choose a 24/7 Plumber You Can Trust
Not all plumbing companies offer true emergency service, and among those that do, quality can vary widely. Choosing the right provider ensures not just faster response times but peace of mind that your home is in skilled hands.
Look for Local Experience
Local plumbers have a vested interest in their community. They understand area-specific issues like hard water, older pipe materials, and seasonal freezing risks. Longstanding local companies often maintain better relationships with suppliers and can access parts faster than national franchises.
A trusted local name like Schneider Plumbing, Heating & Air Conditioning has built decades of credibility by serving families across Jackson and Jennings County.
Verify Licensing, Insurance, and Availability
Always confirm that your emergency plumber is properly licensed and insured. This protects you from liability if something goes wrong during the repair. A legitimate company should have no problem providing credentials upon request.
Also, verify 24/7 availability. Some companies advertise “emergency service” but only return calls during business hours. True emergency providers answer phones at all hours and can dispatch technicians immediately.
Read Customer Reviews
Online reviews and testimonials provide valuable insight into reliability, communication, and professionalism. Look for patterns, positive or negative. A company with consistent praise for punctuality and workmanship is likely a safe choice.
Reviews mentioning technicians by name often signal a company that values personal accountability and long-term customer relationships.
Ask About Pricing Transparency
No one likes hidden fees, especially during a stressful situation. When you call, ask for a clear explanation of rates and what’s included. A trustworthy company will outline:
The emergency service fee or after-hours surcharge
Hourly labor rates
Additional fees (travel, parts, cleanup, etc.)
Transparent pricing builds confidence and helps you make an informed decision without pressure.
Avoiding Premium Rates: Prevention and Planning
While plumbing emergencies can’t always be predicted, proactive maintenance drastically reduces the chances of a midnight leak. Here are a few preventive steps homeowners can take:
Schedule Regular Plumbing Inspections
Have your plumbing system inspected annually to catch corrosion, slow leaks, and pressure issues before they become disasters. Inspections are especially valuable in older homes with galvanized or polybutylene pipes.
Insulate Pipes in Cold Weather
Frozen pipes are a leading cause of wintertime plumbing emergencies. Insulate exposed pipes in crawlspaces, basements, and attics. During extreme cold, let faucets drip slightly to keep water moving.
Replace Aging Water Heaters
Most water heaters last 8–12 years. As they age, internal corrosion can cause leaks that appear suddenly and lead to costly damage. Replacing your unit proactively avoids emergency replacements later.
Know Your Shutoff Valves and Emergency Contacts
Label your home’s water shutoffs and keep your plumber’s number saved in your phone. The faster you act, the less water damage you’ll face, and the lower your emergency plumber cost will be.
Understanding Your Emergency Plumber Cost
An emergency plumber cost depends on when you call, how severe the problem is, and what’s needed to fix it. After-hours rates are higher because they cover technician availability, travel, and the urgency of restoring vital services.
Still, you have options. Knowing when to wait, shutting off water quickly, and working with a trusted local company can keep expenses reasonable while protecting your property.
For homeowners in Jackson and Jennings County, the choice is simple.
Call the Experts at Schneider Plumbing, Heating & Air Conditioning
For over 70 years, Schneider Plumbing, Heating & Air Conditioning has been the reliable choice for homeowners throughout Jackson and Jennings County. As a family-owned business, our mission has always been to improve comfort, safety, and peace of mind through expert plumbing, heating, and cooling services.
Whether you’re dealing with a burst pipe at 2 a.m. or just need advice on preventive maintenance, our certified technicians are here to help, day or night. We take pride in transparent pricing, prompt response times, and lasting repairs you can count on.
Contact us today to schedule service or learn more about how our team can protect your home from unexpected plumbing emergencies.
When homeowners start comparing mini split vs. central air cost, the conversation usually begins and ends with installation prices. But the real answer is more nuanced. To know which system is more affordable for you, you need to consider not just upfront installation but also operating costs, maintenance needs, and how your home’s setup affects the value of each choice.
Let’s break it down piece by piece.
Mini Split vs Central Air Cost: Install Price Breakdown
The first and often biggest difference between ductless mini splits and central air systems is how much it costs to get them into your home.
Central Air Installation Installing central air typically costs between $3,500 and $7,500 for a standard home. However, this assumes you already have ductwork in place. If your ducts are old, leaky, or missing entirely, you could be looking at an extra $2,000 to $10,000 to add or replace ductwork.
Mini Split Installation A single-zone ductless mini split (for cooling one area) generally costs between $2,000 and $5,000 installed. For larger homes or multiple zones, expect $8,000 to $15,000 for a whole-home setup. Each indoor unit adds cost, but you avoid the major expense of ducts.
Mini Split vs Central Air Cost: Best Option for No Ducts
If your home doesn’t have ductwork—or the ducts are in poor shape—mini splits win hands down. Adding ducts to an older home can mean tearing into walls, floors, and ceilings, dramatically increasing both the price and disruption. Mini splits only need a small opening to connect the indoor unit to the outdoor compressor.
Verdict: If you already have modern ductwork, central air can be cheaper to install. But in ductless homes, mini splits are almost always the more cost-effective choice.
Mini Split vs Central Air Cost to Run: Efficiency & Bills
Once installed, the real money question becomes: how much will it cost to run?
Efficiency Ratings (SEER2 & HSPF) Mini splits typically have higher efficiency ratings, often ranging from 20–30 SEER2, compared to central air systems that average 14–20 SEER2. That means mini splits convert electricity into cooling more effectively.
Operating Costs For a 2,000-square-foot home in Indiana, the average summer electric bill for central air might add $100–150 per month. A comparable ductless mini split system could save 20–30%, trimming $20–45 per month off your bill.
Heating Advantage Many mini splits double as heat pumps, offering efficient heating in winter. Central air systems don’t heat; they require a separate furnace. In homes without natural gas, the ability to both heat and cool efficiently can make mini splits significantly cheaper year-round.
Mini Split vs Central Air Cost Over 10 Years (TCO)
Looking beyond monthly bills, consider the total cost of ownership (TCO).
On paper, the 10-year cost of ownership is very similar. But in older homes without ducts, the cost of adding ductwork to central air pushes it far higher.
Comfort, Noise, and Aesthetics: Beyond the Numbers
Cost isn’t everything—comfort, noise, and even aesthetics matter too.
Comfort & Zoning Mini splits let you control each room independently. That means you can cool bedrooms at night without wasting energy on unused spaces. Central air cools the entire home evenly, which can be more convenient but less flexible.
Noise Levels Mini splits are whisper-quiet indoors (as low as 19 decibels). Central air units blow air through ducts, and even the quietest systems tend to be louder inside.
Aesthetics Some homeowners dislike the look of wall-mounted mini split air handlers. Central air hides almost everything behind vents and grilles.
Maintenance Needs and Lifespan Compared
Maintenance costs also affect the long-term value.
Mini Splits Filters need to be cleaned monthly. Professional service should be scheduled annually. Average lifespan is 15–20 years.
Central Air Filters are usually replaced quarterly. Duct cleaning may be required every 5–7 years. Annual service is recommended. Average lifespan is 12–15 years.
Overall, mini splits last longer and need less frequent duct-related maintenance, but they do require consistent cleaning of multiple indoor units.
Which System is Right for You?
Every home is unique, so let’s look at a few scenarios:
Older Homes Without Ducts: Mini splits almost always save money by avoiding duct installation costs.
Multi-Zone Homes: Mini splits provide tailored comfort and cut bills by only cooling occupied spaces.
Homes With Good Ductwork Already: Central air may be more affordable upfront and provides a clean, hidden look.
Year-Round Heating & Cooling Needs: Mini splits shine in homes without natural gas furnaces, offering efficient all-in-one comfort.
Final Thoughts
When weighing mini split vs. central air cost, the winner depends on your home’s setup and comfort priorities. Mini splits generally cost more upfront for multi-zone systems but offer long-term savings through efficiency, flexibility, and longer lifespan. Central air is cost-effective in homes with ductwork already in place and offers a seamless aesthetic.
Call Schneider Plumbing, Heating & Air Conditioning
For over 70 years, Schneider Plumbing, Heating & Air Conditioning has been the trusted HVAC partner for homeowners throughout Jackson and Jennings County. Whether you’re considering ductless mini splits, central air, or need expert advice tailored to your home, our family-owned team is here to help.
Contact us today to schedule a consultation and discover the most cost-effective, comfortable solution for your home.
When your cooling system starts to fail, one of the first questions homeowners ask is: “What is the AC replacement cost?” The answer depends on several factors, from the size and type of your unit to efficiency ratings, ductwork, and even brand preference. Understanding these details will help you budget wisely, compare quotes accurately, and decide when it makes more sense to invest in replacement instead of continued repairs.
Below, we’ll break down the typical costs of AC replacement, the major price drivers, and how to know when it’s time to stop repairing and upgrade.
AC Replacement Cost: Typical Price Range & What Affects It
Typical Cost Range
On average, homeowners in the U.S. can expect to pay between $4,500 and $12,000 for a full central air conditioning replacement. The wide range is due to differences in system capacity, efficiency, installation complexity, and regional pricing. High-end systems with advanced efficiency ratings or specialized installations may even exceed $15,000.
Major Factors That Influence Price
System Size (Tonnage) Air conditioners are sized in tons, which refers to cooling capacity rather than weight. Most homes require systems between 2 and 5 tons. Larger homes need larger units, and each additional ton increases cost significantly.
Efficiency Ratings (SEER2 Standards) Today’s air conditioners must meet new SEER2 standards (Seasonal Energy Efficiency Ratio). Units with higher SEER2 ratings save money on electricity but come with higher upfront costs. A 14.3 SEER2 system will cost less than a 20+ SEER2 unit but won’t deliver the same energy savings over time.
Ductwork Condition If your existing ductwork is leaky, undersized, or damaged, replacement or repair will be necessary, adding thousands to the total. On the other hand, if ducts are in good shape, installation costs are much lower.
Brand and Features Well-known HVAC brands like Trane, Carrier, and Lennox often come at a premium but are valued for durability, technology, and warranty coverage. More budget-friendly brands can still perform well, but may offer fewer advanced features.
Installation Complexity Multi-story homes, homes with tight crawl spaces, or systems requiring electrical upgrades will increase labor costs.
AC Replacement Cost by Home & System Type
Different types of AC systems and home layouts come with unique costs.
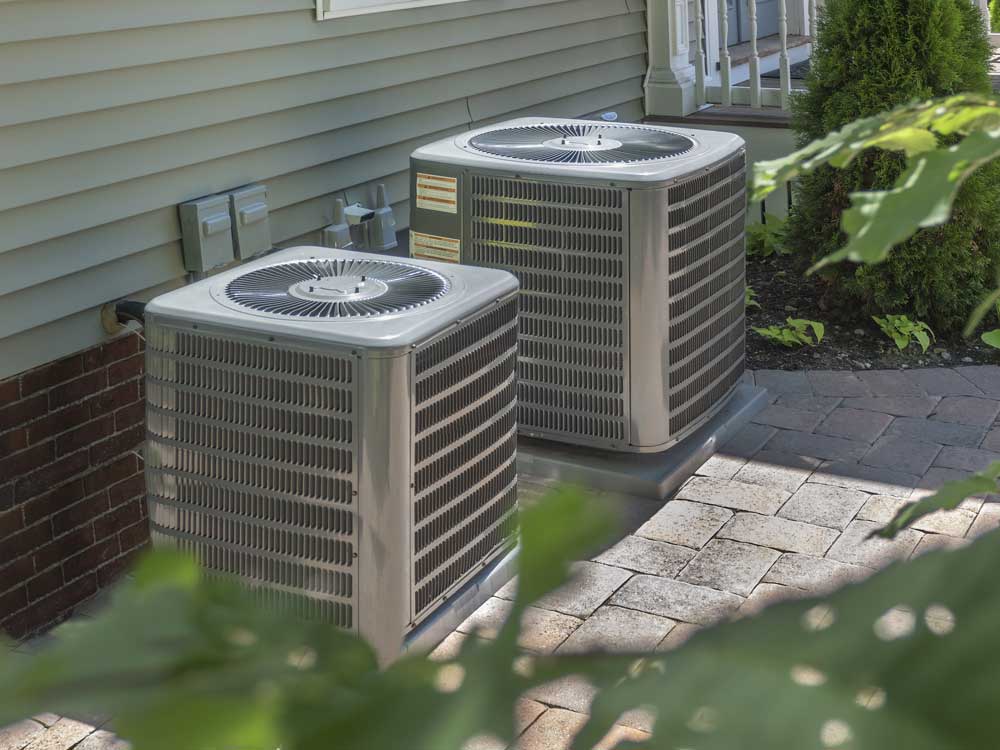
Central AC Systems Most common in medium to large homes, central air replacements typically run $5,000–$12,000 depending on size and efficiency.
Ductless Mini-Splits Ideal for homes without ductwork or for room-by-room cooling. Cost ranges $3,000–$10,000 per zone, depending on the number of indoor units.
Heat Pumps A heat pump provides both heating and cooling. Replacement costs typically fall between $6,000–$14,000, but utility rebates often reduce the net cost.
Packaged Systems Used in homes without basements or attics, packaged systems house all components in one outdoor cabinet. They generally cost $7,000–$12,000.
Window & Portable Units While not true “replacements” for central AC, these run between $300 and $1,500 per unit and serve as stopgaps, not whole-home solutions.
Repair or Replace Your AC: How to Decide
Deciding between repair and replacement can be stressful. Here are the signs that replacement may be the smarter investment.
Age of System: ACs typically last 10–15 years. Beyond that, efficiency drops, and major parts often fail.
Frequent Breakdowns: If you’re calling for repairs multiple times per summer, replacement pays off quickly.
Rising Energy Bills: Older systems lose efficiency, leading to higher monthly costs.
Uneven Cooling or Excess Humidity: These are signs of declining performance that repairs may not fix long-term.
AC Replacement Cost vs. Repair: Break-Even Math
A common rule of thumb is the “$5,000 rule.” Multiply the age of your AC by the cost of the repair. If the result exceeds $5,000, replacement is usually the smarter choice.
Example:
A 12-year-old unit needs a $600 repair.
12 × $600 = $7,200 → Replacement makes more sense.
This simple math helps homeowners make financially sound decisions.
AC Replacement Cost Add-Ons: Thermostats, Ductwork, Permits
Replacement isn’t always limited to the AC unit itself. Extra costs can include:
Thermostat Upgrades: Installing a programmable or smart thermostat may add $200–$500.
Ductwork Repairs/Replacement: If ducts are old or inefficient, replacement can add $2,000–$5,000 or more.
Permits & Inspections: Most municipalities require permits for AC replacements. Expect $150–$500 in fees.
Electrical Upgrades: If your home’s panel can’t support the new system, costs for upgrading can range $500–$2,000.
Financing, Rebates, and Warranties Explained
Financing Options Many HVAC contractors offer in-house financing, allowing you to spread payments over several months or years. With competitive interest rates, financing can make high-efficiency systems more affordable.
Rebates & Tax Credits Federal and state programs, as well as local utility rebates, can cut hundreds or even thousands off the total AC replacement cost. For example, energy-efficient heat pumps often qualify for rebates up to $2,000 or more.
Warranties Manufacturer warranties typically cover 10 years on parts, while labor coverage depends on your contractor. Extended warranties may be worth the cost for peace of mind.
Next Steps: Get Quotes and Save on AC Replacement
Replacing an air conditioner is a major investment, but understanding your options helps you get the best value. Start by:
Getting Multiple Quotes: Compare prices, system options, and warranties.
Checking for Rebates: Look into federal, state, and local incentives.
Evaluating Long-Term Savings: Consider energy efficiency, not just upfront cost.
Choosing a Trusted Contractor: Quality installation is just as important as the system itself.
Why Choose Schneider Plumbing, Heating & Air Conditioning
For over 70 years, Schneider Plumbing, Heating & Air Conditioning has been the trusted name in comfort for Jackson and Jennings County. As a family-owned company, we believe in delivering more than just equipment—we provide peace of mind, reliability, and expert service when you need it most.
Whether you’re weighing repair versus replacement or ready to install a high-efficiency AC system, our team is here to guide you every step of the way. We’ll help you navigate rebates, financing, and warranties so you can make the best decision for your home and budget.
Contact us today for a no-obligation quote and start enjoying a cooler, more comfortable home.
When it comes to thermostat installation, homeowners are often faced with a common question: Should you tackle the job yourself or call in a professional? On the surface, replacing or installing a thermostat may seem straightforward—a small device mounted on the wall that connects to your HVAC system. However, what’s hidden behind the wall can make the difference between a smooth upgrade and a costly, frustrating mistake.
While DIY installation might seem appealing for those who enjoy hands-on projects, professional installation offers peace of mind, efficiency, and long-term reliability—especially as modern thermostats grow more sophisticated. Let’s explore the pros and cons of each approach, common mistakes to avoid, and why hiring a technician often comes out on top.
Pros and Cons of DIY Installation
Many homeowners are drawn to the idea of installing a thermostat themselves because it can save on upfront labor costs. With the right tools, a YouTube tutorial, and some basic knowledge, a confident DIYer might complete the project in an hour or two. But there’s more to consider than just potential savings.
Benefits of DIY Installation
Lower Initial Cost – You avoid labor charges, which can range from $75 to $200 depending on your location and the complexity of the system.
Immediate Control – You can replace the thermostat at your convenience without scheduling an appointment.
Satisfaction and Learning – For the handy homeowner, there’s pride in successfully completing a home improvement task.
Risks and Drawbacks of DIY Installation
Electrical Safety Hazards – Thermostats connect directly to your home’s HVAC control wiring, and incorrect wiring can short-circuit your system, damage the thermostat, or even pose a fire risk.
Compatibility Errors – HVAC systems vary widely, and not every thermostat works with every system. Choosing the wrong one can mean wasted money and a system that won’t operate properly.
Loss of Warranty – Many thermostat and HVAC manufacturers require professional installation to maintain warranties. DIY work might void coverage.
Hidden Complexity – While older thermostats were simple, modern units—especially smart thermostats—often require software setup, Wi-Fi connectivity, and sometimes a common wire (C-wire) installation.
When to Hire a Technician
Professional HVAC technicians bring not only the right tools but also years of experience and training. This expertise ensures your thermostat is compatible, installed correctly, and optimized for your comfort and efficiency needs.
Wiring and Compatibility Issues
One of the most common pitfalls in DIY thermostat installation is wiring. HVAC systems can operate on low voltage, high voltage, or even millivolt systems, and wiring configurations vary significantly. Miswiring can cause your heating or cooling to malfunction—or stop working altogether.
A professional technician will:
Verify Compatibility – Ensuring the thermostat matches your HVAC system type (single-stage, multi-stage, heat pump, or zoned system).
Handle C-Wire Installation – Many modern thermostats require a C-wire to provide continuous power. If your current setup lacks one, a pro can run new wiring safely.
Check System Load – Some systems need relays or adapters to work with advanced thermostats.
Benefits of Hiring a Pro
Expert Troubleshooting – If something isn’t working, technicians can quickly diagnose the issue.
Safe Handling – HVAC professionals understand electrical safety and building codes.
Optimal Performance – Proper calibration ensures your HVAC system runs efficiently, extending its lifespan and reducing energy costs.
Smart Thermostat Considerations
The rise of smart thermostats—like the Nest, Ecobee, and Honeywell Lyric—has changed the thermostat landscape. These devices offer energy-saving features, remote access, and detailed usage reports, but they also introduce more complexity.
Features of Modern Thermostats
Smart thermostats often include:
Learning Algorithms – They adapt to your schedule automatically over time.
Geofencing – Adjusts temperature based on your smartphone’s location.
Integration with Smart Homes – Works with voice assistants, security systems, and lighting controls.
Energy Usage Reports – Helps identify ways to save on utility bills.
While these features are appealing, setup can involve connecting to your home’s Wi-Fi, creating user accounts, linking to other smart devices, and navigating app-based controls. A technician familiar with these systems can streamline setup, ensure all features work correctly, and even guide you through operation.
Cost Comparison and Savings
When deciding between DIY and professional thermostat installation, it’s tempting to focus only on the upfront cost. But the total value goes beyond initial expenses.
DIY Installation
Thermostat cost: $50–$300 depending on features.
Labor: $0 if self-installed.
Potential hidden costs: Damaged HVAC control board ($200–$600), hiring a pro later to fix mistakes, voided warranties.
Professional Installation
Thermostat cost: Same as DIY, often purchased through the technician or brought by the homeowner.
Labor: $75–$200 on average.
Added value: Ensures warranty protection, optimal operation, reduced energy costs over time.
In many cases, professional installation pays for itself by preventing mistakes and maximizing efficiency, especially with high-end smart thermostats.
Common DIY Mistakes That Can Cost You
Even the most confident DIYers can stumble when it comes to thermostat installation. Some of the most frequent errors include:
Not turning off the power before starting work.
Incorrect wiring leading to short circuits.
Installing in the wrong location, such as near a draft, heat source, or direct sunlight, which can throw off temperature readings.
Skipping system configuration so the thermostat doesn’t communicate properly with the HVAC system.
Each of these mistakes can result in higher energy bills, equipment damage, or the need for emergency repairs.
Why Professional Installation is Worth It
While DIY thermostat installation might look simple on paper, the real-world complexity can quickly outweigh the initial cost savings. A professional brings:
Peace of mind knowing your HVAC system will run safely and efficiently.
Time savings by completing the job quickly and correctly.
Expert advice on the best thermostat for your needs and budget.
In short, when it comes to something as central to your home’s comfort and efficiency as the thermostat, hiring a pro is a wise investment.
Final Thoughts
A thermostat might be small, but it plays a big role in your home’s comfort and energy efficiency. While DIY installation may work for a select group of handy homeowners, most people benefit more from professional service, especially with today’s advanced smart thermostats and varied HVAC systems.
Contact Us Today
If you’re considering upgrading your thermostat, trust the experts at Schneider Plumbing, Heating & Air Conditioning. For over 70 years, we’ve proudly served Jackson and Jennings County, helping our neighbors enjoy comfortable, efficient homes. As a family-owned HVAC company, we’re committed to delivering the highest level of service, whether you need a simple upgrade or a complex smart thermostat installation.
Contact us today to schedule your professional thermostat installation and enjoy peace of mind knowing the job will be done right the first time.