A furnace making a rattling noise can be more than a minor household annoyance. While some furnace sounds are normal during startup and shutdown, persistent rattling often points to loose parts, airflow problems, worn components, or more serious internal damage. In some cases, the noise may even signal a safety concern that should be addressed before the system continues running. Understanding what causes furnace rattling can help homeowners respond quickly, prevent expensive repairs, and protect their home’s heating system from avoidable failure.
When temperatures drop, your furnace becomes one of the most important systems in your home. It keeps your living spaces warm, supports indoor comfort, and helps protect plumbing, flooring, and other household materials from cold-related issues. Because the furnace plays such a critical role, unusual noises should never be ignored. A rattle may start small, but if the underlying issue worsens, it can lead to broken components, reduced efficiency, poor heating performance, or even a complete system shutdown.
Below, we’ll explain what rattling furnace noises may mean, the mechanical issues that can cause them, how to reduce the risk of furnace damage, and when it’s time to call a professional HVAC technician.
What a Furnace Making a Rattling Noise Means
A rattling noise usually means something inside or around the furnace is loose, vibrating, worn, or out of balance. Furnaces contain several moving and non-moving parts that must stay properly secured for the system to operate safely and efficiently. When one of those parts shifts out of place, loosens over time, or begins to fail, the furnace may make a rattling, clanking, vibrating, or shaking sound.
Some rattling sounds are relatively simple to resolve. For example, a loose access panel may vibrate when the blower motor turns on. In other situations, the sound may indicate a more serious issue, such as a failing blower wheel, damaged motor bearing, cracked heat exchanger, or loose internal hardware.
A furnace may rattle during:
Startup
Shutdown
Continuous heating cycles
Blower operation
High airflow periods
Ignition or burner operation
The timing of the noise can help identify the cause. A rattle that happens only when the blower starts may point to blower assembly issues. A rattle during ignition could be related to burner components. A constant vibration throughout the heating cycle may be caused by loose panels, ductwork, or internal parts.
It’s also important to pay attention to where the noise seems to come from. Rattling near the furnace cabinet may suggest loose exterior panels. Rattling from the duct system may indicate loose metal ductwork. Rattling from deep inside the furnace should be inspected promptly because internal furnace components are not always safe or simple for homeowners to access.
Ignoring furnace rattling can be risky because the underlying problem rarely fixes itself. Loose parts can become looser. Worn bearings can fail. Vibrations can damage nearby components. Airflow problems can strain the blower motor. What begins as an irritating sound can eventually become a costly repair.
Furnace making a rattling noise from loose panels
One of the most common reasons for a furnace making a rattling noise is a loose panel or cover. Furnace access panels are designed to protect internal components, help guide airflow, and keep the unit operating as intended. If a panel is not fully secured, it may vibrate when the furnace turns on.
Loose panels can happen for several reasons:
The panel was not reattached properly after filter replacement
Screws have loosened over time
The furnace cabinet has shifted slightly
Repeated vibration has caused the panel to move
The panel is bent, dented, or misaligned
This type of rattling may sound like a light metallic vibration. It may become louder when the blower motor runs because airflow and motor vibration can cause the loose panel to shake against the furnace cabinet.
Homeowners can sometimes identify this issue by carefully looking at the outside of the furnace. If a panel appears uneven, loose, or not fully latched, that may be the source of the sound. However, the furnace should be turned off before touching panels or attempting basic visual checks. If the panel does not secure easily or the rattling continues after it is properly closed, it’s best to schedule a professional inspection.
Loose panels may seem minor, but they should still be corrected. A poorly secured furnace panel can affect airflow, expose components to dust, or allow vibration to continue spreading through the system. Over time, constant vibration can loosen other parts and contribute to additional wear.
Mechanical Issues That Cause Rattling Sounds
While loose exterior panels are common, many rattling noises come from mechanical problems inside the furnace. These issues are often more serious because they involve components that directly affect heating performance, airflow, ignition, or system safety.
Blower motor and internal component failures
The blower motor is responsible for moving heated air through your ductwork and into your home. Because this part runs frequently during the heating season, it can develop wear over time. If the blower motor or blower wheel becomes loose, damaged, or unbalanced, the furnace may produce a noticeable rattling or banging sound.
Common blower-related causes include:
Loose blower wheel
Worn motor bearings
Bent blower fan blades
Debris caught in the blower assembly
Loose mounting bolts
Motor imbalance
Failing belt in older furnace models
A blower wheel that is loose or off balance can shake while spinning. This creates vibration that may sound like rattling inside the furnace cabinet. If the problem worsens, the blower may scrape, bang, or stop moving air properly. Reduced airflow can cause uneven heating, longer run times, higher energy use, and overheating inside the furnace.
Worn motor bearings can also create rattling, grinding, or squealing noises. Bearings help the motor operate smoothly. When they wear out, the motor may struggle, vibrate, or eventually fail. A failing blower motor is not something homeowners should ignore because it can leave the furnace unable to circulate warm air.
Other internal components can rattle as well. Burners, screws, brackets, wiring, and heat shields must remain secure during operation. If any of these components loosen, they can vibrate when the furnace runs. In some cases, rattling may come from debris inside the furnace cabinet, such as a small object, a piece of insulation, or a broken component fragment.
A cracked heat exchanger can also create unusual noises, including rattling, clicking, or popping. This is a serious safety concern because the heat exchanger separates combustion gases from the air that circulates through your home. If it is damaged, carbon monoxide exposure may become a risk. Not every rattling sound indicates a cracked heat exchanger, but because the possibility is serious, unexplained furnace noises should always be evaluated by a trained HVAC professional.
Ductwork may also be part of the problem. Metal ducts naturally expand and contract as warm air moves through them. This can sometimes cause popping or ticking. However, rattling ductwork may indicate loose connections, unsupported sections, or excessive airflow pressure. If duct rattling is caused by system imbalance or airflow restriction, the furnace may be working harder than necessary.
Mechanical rattling can be caused by several conditions, including:
Loose internal fasteners
Damaged blower wheel
Motor wear
Worn bearings
Debris in the furnace cabinet
Loose ductwork
Expanding and contracting sheet metal
Failing ignition or burner components
Cracked or damaged heat exchanger
Airflow restrictions
Because many of these problems happen inside the furnace, professional diagnosis is the safest and most reliable option. HVAC technicians have the tools, training, and experience to inspect internal components without damaging the system or creating safety hazards.
How to Prevent Furnace Damage
Preventing furnace damage starts with responding to unusual noises early. A rattling furnace is often a warning sign that the system needs attention. The sooner the source of the sound is identified, the easier it may be to prevent larger problems.
Homeowners can take several steps to reduce the risk of furnace damage:
Replace the air filter regularly
Keep return and supply vents open and clear
Avoid storing items too close to the furnace
Listen for changes in furnace sounds
Schedule annual heating maintenance
Keep the area around the furnace clean
Make sure access panels are properly secured
Call for service when noises persist or worsen
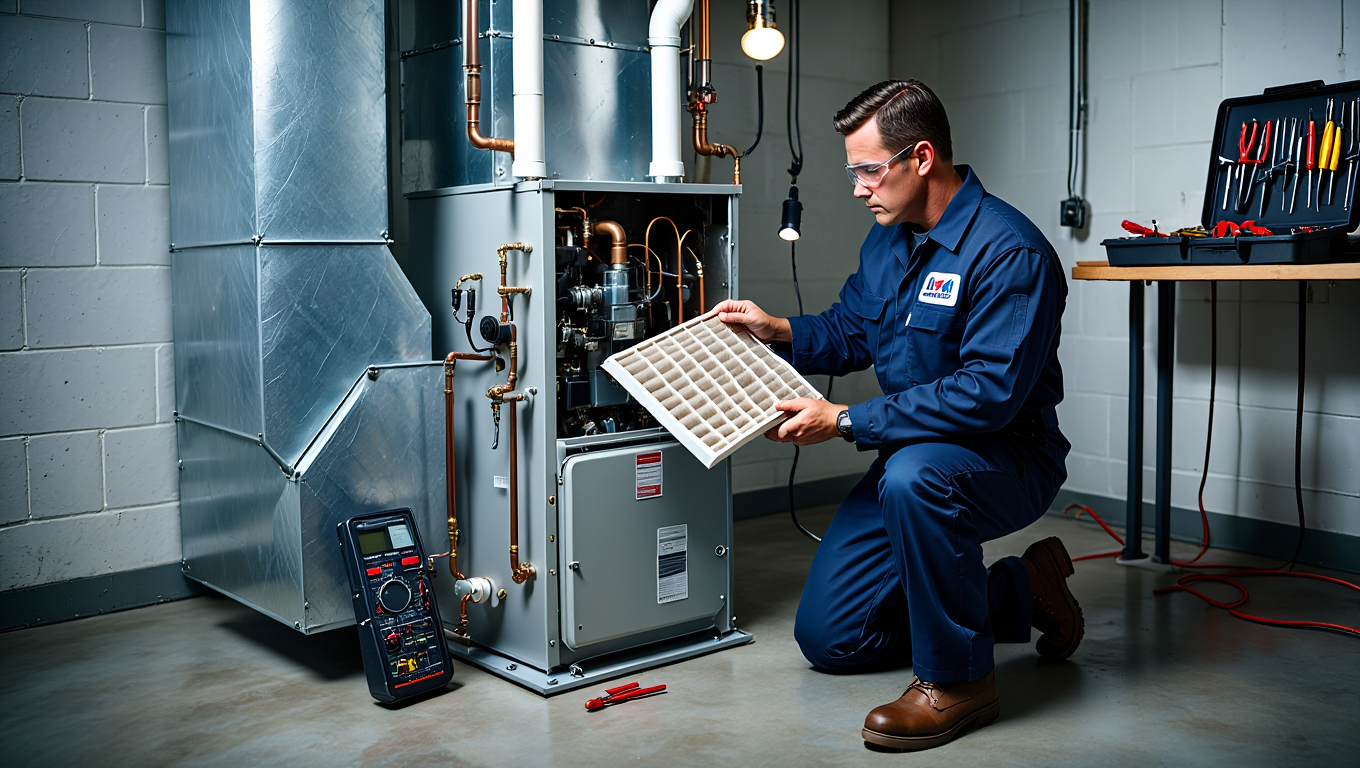
A dirty air filter is one of the simplest problems to prevent, but it can have a major impact on furnace performance. When the filter becomes clogged, airflow is restricted. This forces the blower motor to work harder, increases strain on the system, and may contribute to overheating or vibration. Replacing filters according to the manufacturer’s recommendations can help protect the blower motor and improve indoor comfort.
Blocked vents can create similar problems. When furniture, rugs, curtains, or other items block airflow, pressure can build within the duct system. This may cause ducts to rattle or make the furnace run longer to heat the home. Keeping vents open and unobstructed supports balanced airflow and helps the furnace operate more efficiently.
Annual furnace maintenance is one of the best ways to prevent rattling noises and system damage. During a maintenance visit, an HVAC technician can inspect the furnace, tighten loose parts, clean key components, check airflow, test safety controls, and look for signs of wear. This proactive service can catch small problems before they become major repairs.
Maintenance is especially important before the heating season begins. A furnace that has been sitting unused for months may have dust buildup, loose panels, worn components, or other issues that become noticeable once the system starts running regularly again.
Homeowners should also avoid delaying service when the furnace makes new or unusual sounds. Rattling that continues after checking the exterior panel or replacing the air filter should be inspected. Waiting too long may allow damage to spread from one component to another. For example, a loose blower wheel can damage the motor shaft, housing, or surrounding parts if it continues operating while unbalanced.
Why professional furnace inspection matters
A professional furnace inspection is important because rattling noises can have many causes, and not all of them are visible from the outside. While a homeowner may be able to notice a loose panel or dirty filter, internal problems require specialized knowledge and equipment.
During a professional inspection, an HVAC technician may check:
Furnace cabinet panels and fasteners
Blower motor condition
Blower wheel alignment
Motor bearings
Burner assembly
Heat exchanger condition
Ignition system
Electrical connections
Safety switches
Airflow levels
Ductwork connections
Filter condition
Signs of overheating or wear
This detailed approach helps identify both the immediate cause of the rattling and any related issues that could affect system performance. For example, the noise may come from the blower assembly, but the root cause may be restricted airflow due to a clogged filter or duct problem. Addressing only the noise without correcting the underlying issue may lead to repeat repairs.
Professional service is also essential for safety. Furnaces that burn natural gas, propane, or oil involve combustion. Problems with burners, venting, or the heat exchanger can create serious risks. A trained technician can test the system safely and determine whether it is operating within acceptable limits.
Homeowners should turn off the furnace and call for service right away if rattling is accompanied by:
Burning odors
Gas smells
Frequent cycling
Weak airflow
No heat
Loud banging
Yellow or flickering pilot flame
Carbon monoxide detector alerts
Visible damage to the furnace
Smoke or electrical smells
These symptoms may indicate a more urgent issue that requires immediate attention. If you smell gas, leave the home and contact your gas utility or emergency services before calling for HVAC repair.
Even when the noise seems minor, professional inspection provides peace of mind. A technician can determine whether the furnace needs a simple adjustment, component replacement, cleaning, or more extensive repair. In some cases, especially with older systems, recurring rattling may indicate that the furnace is nearing the end of its service life. A professional can help you understand whether repair or replacement is the better long-term option.
FAQ
Why is my furnace making a rattling noise?
A furnace may rattle because of loose access panels, unsecured internal parts, blower motor problems, ductwork vibration, debris inside the cabinet, or worn mechanical components. If the sound continues or gets louder, schedule a professional inspection.
Is a rattling furnace dangerous?
A rattling furnace is not always dangerous, but it can be. Some causes are minor, such as a loose panel. Others may involve failing internal parts, combustion issues, or a cracked heat exchanger. Because safety risks are possible, unexplained rattling should not be ignored.
Can I keep running my furnace if it rattles?
It depends on the severity and cause of the noise. If the rattling is light and you can confirm it is from a loose exterior panel, securing the panel may resolve it. If the sound is loud, persistent, or coming from inside the unit, turn the system off and call an HVAC professional.
How do I know if the blower motor is causing the rattling?
Blower motor issues often create rattling, grinding, humming, or vibration when the fan runs. You may also notice weak airflow, uneven heating, or longer heating cycles. A technician can inspect the blower motor, wheel, bearings, and mounting hardware to confirm the cause.
Can dirty filters cause rattling furnace noises?
A dirty filter may not directly rattle, but it can restrict airflow and strain the blower motor. This extra strain may contribute to vibration, overheating, and unusual system noises. Regular filter replacement helps protect the furnace from unnecessary wear.
How often should I schedule furnace maintenance?
Most homeowners should schedule furnace maintenance once a year, ideally before the heating season. Annual maintenance helps identify loose parts, airflow problems, worn components, and safety concerns before they lead to breakdowns.
When should I replace my furnace instead of repairing it?
Replacement may be worth considering if your furnace is older, needs frequent repairs, struggles to heat your home, makes recurring loud noises, or has a major safety issue such as a cracked heat exchanger. An HVAC professional can help compare repair costs with replacement options.
Call Schneider Plumbing, Heating & Air Conditioning for Furnace Service
If your furnace is rattling, don’t wait for the problem to turn into a breakdown. Schneider Plumbing, Heating & Air Conditioning is here to help homeowners throughout Jackson and Jennings County stay safe, warm, and comfortable. For over 70 years, our team has been a reliable plumber and HVAC company helping friends and neighbors live more comfortably at home.
As a family-owned HVAC company, we are committed to improving customers’ lives through quality heating, cooling, and plumbing services. Whether your furnace needs a simple adjustment, a detailed inspection, or professional repair, our team is ready to provide the highest level of service whenever you need help from an expert.
Schedule service with us today and get dependable help for your rattling furnace before the issue leads to bigger problems.
When you have an AC running but not cooling, it can quickly turn a comfortable home into a frustrating, sticky, and stressful space. Your air conditioner may sound like it is working, the fan may be blowing, and the thermostat may show that the system is on, but the air coming from the vents feels warm, weak, or barely cooler than the room temperature. This is one of the most common cooling problems homeowners experience, especially during long stretches of hot weather when an air conditioner is working harder than usual.
In many cases, an air conditioner that runs without cooling is a sign that something is preventing the system from absorbing heat from inside your home and releasing it outdoors. Sometimes the cause is simple, such as a clogged air filter or an incorrect thermostat setting. Other times, the issue involves refrigerant loss, dirty coils, failing electrical components, or a compressor problem that requires professional AC repair.
Understanding the possible causes can help you decide what to check first, what problems are urgent, and when it is time to call a qualified HVAC technician. Below are the most common reasons an AC system keeps running but fails to cool properly.
Why Your AC Is Running but Not Cooling
An air conditioner does more than blow cold air. It works by moving heat out of your home. Warm indoor air passes over the evaporator coil, where refrigerant absorbs heat. That heat is then carried outside and released through the condenser coil. If any part of this process is interrupted, your system may continue running without delivering the cool air you expect.
A few warning signs can point to a cooling issue, including:
Warm or room-temperature air coming from vents
Weak airflow throughout the home
Uneven cooling from room to room
The AC running constantly without reaching the thermostat setting
Ice forming on the refrigerant lines or evaporator coil
Unusual sounds coming from the indoor or outdoor unit
Higher energy bills without improved comfort
The outdoor unit not turning on while the indoor fan runs
Before assuming the worst, homeowners can check a few basic items. Make sure the thermostat is set to “cool,” and the temperature is set lower than the current indoor temperature. Confirm that the fan setting is on “auto” rather than “on.” When the fan is set to “on,” it may continue blowing air even when the cooling cycle is not active, which can make it seem like the AC is running without cooling.
You should also inspect your air filter. A dirty filter can reduce airflow enough to affect cooling performance. If the filter is clogged with dust, pet hair, or debris, replace it and give the system time to stabilize. Check that vents are open and not blocked by furniture, rugs, curtains, or storage items. Outside, make sure the condenser unit has space around it and is not covered by leaves, grass clippings, or overgrown landscaping.
If these simple checks do not solve the problem, the issue may be inside the cooling system itself.
Common Cooling System Failures
Air conditioners depend on proper airflow, refrigerant pressure, electrical controls, and clean components. When one of these areas fails, the system may still turn on but struggle to cool the home. Some problems develop gradually, while others happen suddenly due to a failed part or damaged connection.
AC is running but not cooling due to refrigerant issues
Refrigerant is essential to your air conditioner’s cooling process. It circulates through the system, absorbing heat from indoor air and releasing that heat outside. If your AC does not have the correct refrigerant charge, it cannot remove heat efficiently.
Low refrigerant is often caused by a leak. Since refrigerant is contained in a closed system, it should not run out under normal conditions. If the level is low, simply adding more refrigerant is not a long-term solution unless the leak is found and repaired.
Signs of a refrigerant problem may include:
Warm air blowing from the vents
Ice buildup on refrigerant lines or coils
Hissing or bubbling sounds near the AC system
Longer cooling cycles
Poor humidity control
Higher utility bills
The system cooling less effectively over time
Refrigerant issues should always be handled by a licensed HVAC professional. Refrigerant must be handled safely and according to applicable regulations. A technician can inspect the system, locate leaks, repair damaged components, and recharge the system to the manufacturer’s specifications.
Ignoring a refrigerant issue can lead to more serious damage. When refrigerant levels are low, the compressor may be forced to work harder. Since the compressor is one of the most important and expensive parts of an air conditioner, prompt repair is the best way to protect the system.
Dirty coils and airflow restrictions
Airflow problems are another major reason an AC runs without cooling. Your system needs steady airflow across the indoor evaporator coil and outdoor condenser coil. If airflow is blocked, restricted, or reduced, the AC cannot transfer heat properly.
The evaporator coil is located inside the indoor portion of the system. When it becomes dirty, dust and debris can create a layer of insulation that prevents the coil from absorbing heat effectively. In some cases, restricted airflow can cause the coil to become too cold and freeze. Once ice forms, cooling performance drops even more.
The outdoor condenser coil can also become dirty. This coil releases heat outside. If it is covered in dirt, grass clippings, cottonwood, leaves, or other debris, the system cannot release heat efficiently. As a result, the AC may run longer, cool poorly, and place extra strain on major components.
Common airflow restrictions include:
Dirty or clogged air filters
Blocked supply or return vents
Dust buildup inside ductwork
Dirty evaporator coils
Debris around the outdoor condenser
A failing blower motor
Damaged or leaking ducts
Closed dampers or improperly balanced airflow
Homeowners can help prevent airflow problems by changing air filters regularly and keeping the area around the outdoor unit clear. Most filters should be checked monthly during peak cooling season, especially in homes with pets, high dust levels, or frequent AC use.
However, coil cleaning and blower motor diagnosis should be left to professionals. HVAC technicians have the tools and cleaning methods needed to remove buildup without damaging sensitive system components.
Thermostat and electrical control problems
Sometimes the air conditioner itself is capable of cooling, but the controls that tell it when and how to operate are not working properly. Thermostat issues and electrical control problems can cause confusing symptoms, including an indoor fan that runs while the outdoor unit does not.
Start with the thermostat. If the thermostat is set incorrectly, placed in direct sunlight, located near a heat source, or losing power, it may not communicate properly with the AC system. Weak batteries, loose wiring, or calibration problems may also prevent the system from cooling as expected.
Electrical issues can involve several components, including:
Capacitors
Contactors
Relays
Control boards
Wiring connections
Breakers
Fuses
Safety switches
Fan motors
For example, the indoor blower may run, but the outdoor condenser may not start because of a failed capacitor or contactor. Without the outdoor unit, the system cannot release heat, so the air from the vents will not cool properly. In other cases, a tripped breaker or blown fuse may shut down part of the system while another part continues operating.
Electrical AC problems should not be handled as a do-it-yourself repair. Air conditioners use high-voltage components that can be dangerous without proper training. A professional technician can test parts safely, confirm the source of the failure, and replace components correctly.
When AC Repair Is the Best Solution
Some AC cooling problems can be improved with basic homeowner maintenance, such as replacing a filter or clearing debris around the outdoor unit. However, professional service is the best solution when the issue involves refrigerant, electrical components, frozen coils, poor airflow from mechanical failure, or repeated performance problems.
You should schedule AC repair if:
The system runs constantly but never reaches the set temperature
Air from the vents is warm or weak
The outdoor unit will not turn on
Ice is visible on the system
You hear buzzing, grinding, rattling, or hissing sounds
The AC trips the breaker repeatedly
Your energy bills have increased unexpectedly
Some rooms are much hotter than others
The system has needed multiple recent repairs
The AC is older and struggling to keep up
Prompt repair can help prevent a small problem from becoming a major system failure. For example, a clogged filter may seem minor, but if it causes frozen coils or blower motor strain, repair costs can increase. A refrigerant leak may start small, but it can eventually damage the compressor. Electrical issues may worsen over time and affect other parts of the system.
Professional AC service is also valuable because cooling issues often have more than one cause. A technician can evaluate the complete system, including thermostat operation, refrigerant pressure, coil condition, blower performance, ductwork, electrical components, and temperature split. This helps ensure the real problem is fixed rather than temporarily masked.
In some cases, the best solution may not be a repair. If your air conditioner is older, inefficient, frequently breaking down, or using outdated components, replacement may be more cost-effective. A professional HVAC company can help you compare repair costs, system age, efficiency, and long-term comfort needs so you can make a confident decision.
Preventive maintenance is another important part of avoiding cooling problems. Annual AC tune-ups help identify worn parts, dirty components, airflow issues, and performance concerns before they lead to breakdowns. Regular maintenance can also improve energy efficiency, extend equipment life, and help your home stay more comfortable during the hottest months.
FAQ
Why is my AC running but blowing warm air?
Your AC may be blowing warm air because of a dirty air filter, low refrigerant, a dirty coil, a thermostat issue, or a problem with the outdoor unit. If changing the filter and checking the thermostat do not help, schedule professional AC service.
Can a dirty air filter stop my AC from cooling?
Yes. A clogged air filter restricts airflow, which can reduce cooling performance and may cause the evaporator coil to freeze. Replacing the filter is one of the first things homeowners should check when the AC is not cooling.
Is low refrigerant normal in an air conditioner?
No. Refrigerant should not run low under normal operation. If your system has low refrigerant, there is likely a leak that needs to be located and repaired by a professional HVAC technician.
Why is my outside AC unit not turning on?
The outdoor unit may not turn on because of a tripped breaker, failed capacitor, bad contactor, wiring problem, thermostat issue, or motor failure. Because electrical components can be dangerous, this problem should be inspected by a professional.
Should I turn off my AC if it is not cooling?
Yes, in many cases it is wise to turn the system off, especially if you see ice, hear unusual noises, or notice the outdoor unit is not working. Continuing to run a malfunctioning AC can make the problem worse.
How often should I replace my AC filter?
Many filters should be checked monthly and replaced every one to three months, depending on the filter type, household dust, pets, allergies, and how often the system runs. During peak cooling season, check it more often.
When should I call for AC repair?
Call for AC repair when basic checks do not restore cooling, the system runs constantly, warm air comes from the vents, ice forms, the breaker trips, or the outdoor unit does not operate. Professional diagnosis can prevent further damage.
Call Schneider Plumbing, Heating & Air Conditioning for Reliable AC Repair
If your AC is running but not cooling, do not wait for the problem to get worse. The experienced team at Schneider Plumbing, Heating & Air Conditioning can inspect your system, identify the cause of the cooling issue, and recommend the right repair for your home.
For over 70 years, we have been a reliable plumber helping friends and neighbors throughout Jackson and Jennings County live more comfortably at home. As a family-owned HVAC company, we are committed to improving customers’ lives through quality heating, cooling, and plumbing services. Our mission is to provide the highest level of service whenever you need help from an expert.
Whether you are dealing with weak airflow, warm air, refrigerant concerns, thermostat problems, or a system that will not keep up, Schneider Plumbing, Heating & Air Conditioning is ready to help. Contact us to schedule service and restore comfort to your home.
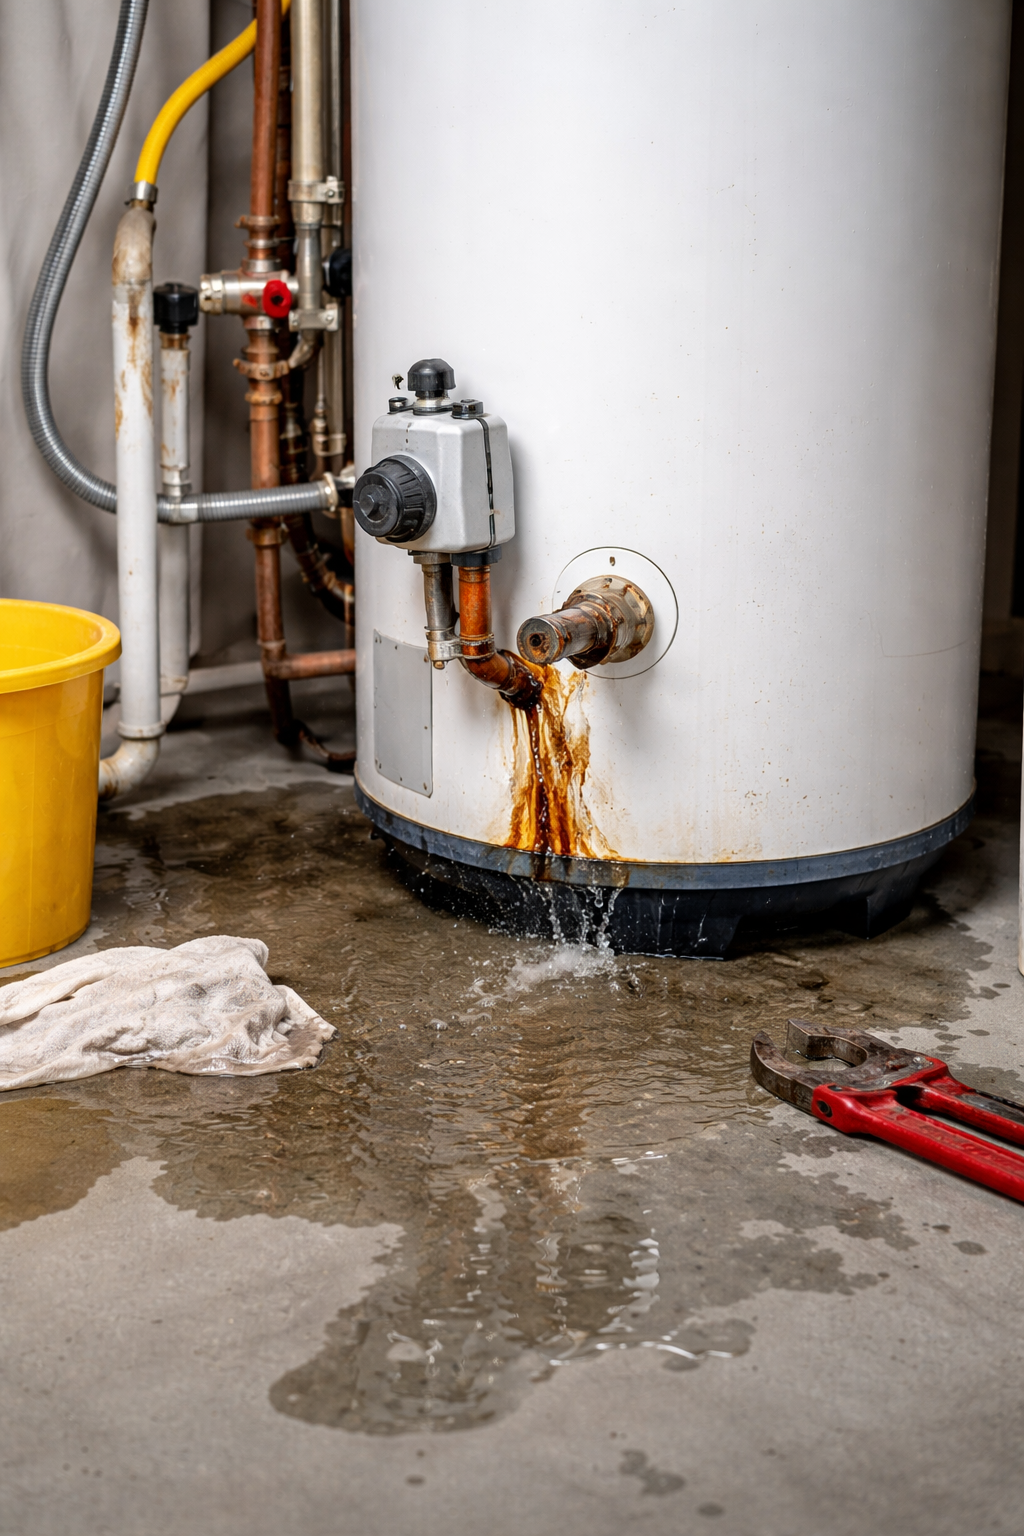
A water heater leaking from the bottom is one of the most concerning plumbing issues a homeowner can face. While some leaks may seem minor at first, water pooling around the base of your unit often signals a deeper problem that can quickly escalate into costly damage. From internal tank corrosion to failing components, bottom leaks should never be ignored. Understanding the causes and knowing what steps to take immediately can help you protect your home, avoid water damage, and restore your hot water supply as quickly as possible.
Why a Water Heater Leaking from the Bottom Is Serious
When a water heater begins leaking from the bottom, it is rarely a superficial issue. Unlike leaks from fittings or connections, bottom leaks often originate from inside the tank itself or from critical safety components. This makes them particularly serious for several reasons:
Potential tank failure: A leak at the base may indicate that the internal tank lining has corroded and failed.
Rapid water damage: Water can quickly spread across floors, seep into subflooring, and damage nearby walls or belongings.
Mold and mildew growth: Persistent moisture creates the perfect environment for mold, which can affect indoor air quality.
Reduced efficiency or total failure: A leaking unit will struggle to maintain proper operation and may stop producing hot water altogether.
Safety concerns: In gas water heaters, leaks can impact burner performance. In electric units, water exposure can create electrical hazards.
Because of these risks, any signs of water collecting beneath your water heater should be treated as urgent.
Common Causes of Bottom Water Heater Leaks
There are several reasons why water might appear at the base of your unit. Identifying the root cause can help determine whether a repair is possible or if replacement is necessary.
Water heater leaking from the bottom due to tank failure
One of the most common and serious causes of a bottom leak is internal tank failure. Over time, the inside of a water heater tank is exposed to minerals, sediment, and constant heating and cooling cycles. Even with protective linings, corrosion can develop.
Key factors that contribute to tank failure include:
Age of the unit: Most water heaters last between 8 to 12 years. Older units are more prone to corrosion.
Sediment buildup: Minerals in hard water settle at the bottom of the tank, creating a layer that traps heat and accelerates wear.
Anode rod depletion: The anode rod is designed to attract corrosive elements. Once it wears out, the tank itself becomes vulnerable.
When the tank fails, water escapes from the bottom and cannot be repaired. In these cases, replacement is typically the only solution.
Pressure relief valve and internal corrosion issues
Another potential cause of water pooling near the base is related to the temperature and pressure relief valve or internal corrosion affecting fittings and seals.
The pressure relief valve is a critical safety feature that releases excess pressure inside the tank. If it malfunctions or if pressure builds too high, water may be discharged and travel down to the base of the unit.
Other related issues include:
Loose or worn drain valves: The drain valve at the bottom of the tank may loosen or degrade over time.
Corroded fittings: Connections inside the unit may deteriorate and allow water to escape.
Excessive pressure buildup: This can force water out of valves and seals, leading to visible pooling.
While some of these issues can be repaired, they still require prompt attention to prevent further damage.
Preventing water damage from sudden leaks
Even a small leak can quickly become a major problem if left unchecked. Taking immediate steps when you notice water at the base of your heater can significantly reduce the risk of damage.
Here is what homeowners should do right away:
Turn off the power or gas supply: This helps prevent safety hazards and further damage.
Shut off the water supply: Locate the cold water shutoff valve above the heater and turn it off.
Drain the tank if necessary: This can help reduce pressure and minimize leakage.
Remove standing water: Use towels or a wet vacuum to clean up water and prevent it from spreading.
Move nearby items: Protect belongings from water exposure.
Taking these steps buys you time while you arrange for professional service.
When to Call a Professional for Water Heater Repairs
While some minor issues like a loose valve may seem manageable, most bottom leaks require expert evaluation. Calling a professional plumber is the safest and most effective way to address the problem.
You should contact a professional immediately if:
The leak is coming directly from the tank
Water is pooling rapidly or spreading
The unit is more than 8 years old
You notice rust, corrosion, or discoloration
There is a lack of hot water or inconsistent performance
You are unsure of the source of the leak
A licensed technician can:
Perform a thorough inspection of the unit
Identify whether repair or replacement is needed
Safely handle gas or electrical components
Ensure the system meets safety standards
Recommend energy efficient upgrade options if necessary
Attempting to repair a failing tank on your own can lead to further damage or safety risks. Professional service ensures the issue is handled correctly the first time.
FAQs
Is a water heater leaking from the bottom always a sign of failure?
Not always, but it is often a serious indicator. While some leaks may come from valves or fittings, many bottom leaks are caused by internal tank damage.
Can I still use my water heater if it is leaking?
It is not recommended. Continuing to use a leaking unit can worsen the problem and increase the risk of water damage or safety hazards.
How long does it take to replace a water heater?
In most cases, a professional can replace a water heater within a few hours, depending on the complexity of the installation.
What is the average lifespan of a water heater?
Traditional tank water heaters typically last 8 to 12 years. Proper maintenance can extend their lifespan.
How can I prevent my water heater from leaking?
Regular maintenance is key. This includes flushing the tank annually, checking the anode rod, and inspecting valves and connections.
Does homeowners insurance cover water heater leaks?
Coverage depends on your policy and the cause of the leak. Sudden and accidental damage is often covered, while neglect or wear and tear may not be.
Protect Your Home with Expert Help from Schneider Plumbing, Heating & Air Conditioning
A water heater leaking from the bottom is not something to ignore. Acting quickly can prevent extensive damage and restore comfort to your home. Whether you need a repair, replacement, or routine maintenance, having a trusted professional on your side makes all the difference.
For over 70 years, Schneider Plumbing, Heating & Air Conditioning has proudly served homeowners throughout Jackson and Jennings County. As a family-owned company, our team is dedicated to delivering dependable plumbing, heating, and cooling services that improve everyday comfort. With a strong commitment to quality workmanship and customer care, Schneider is the name homeowners trust when they need expert service.
If you are dealing with a leaking water heater or want to ensure your system is in top condition, do not wait. Contact our team to schedule service. Experience the peace of mind that comes from working with professionals who put your home and comfort first.
When your air conditioner starts acting up, one of the biggest decisions you will face is whether to repair or replace it. Understanding AC repair vs. replacement cost is essential for making a smart, cost-effective choice that aligns with both your immediate budget and long-term comfort goals. While repairs may seem like the more affordable option upfront, replacement can often deliver greater value over time through improved efficiency, reliability, and performance.
This guide will walk you through the key considerations that homeowners should evaluate when deciding between repairing or replacing an AC system, helping you make a confident and informed decision.
AC Repair vs. Replacement Cost Explained
At first glance, repairing an air conditioner is usually less expensive than replacing it. Minor fixes such as replacing a capacitor, cleaning coils, or fixing a thermostat issue can cost significantly less than installing a brand-new system. However, the true comparison goes beyond the initial price.
Here is how the two options typically differ:
AC Repair Costs
Lower upfront expense
Ideal for minor or isolated issues
Extends the life of your current system
May require repeated service over time
AC Replacement Costs
Higher initial investment
Provides a brand-new, reliable system
Improves energy efficiency and reduces utility bills
Comes with manufacturer warranties and fewer repairs
A helpful rule of thumb many HVAC professionals use is the “5,000 rule.” Multiply the age of your system by the repair cost. If the total exceeds $5,000, replacement is often the better option. For example, a 12-year-old unit needing a $500 repair equals $6,000, suggesting replacement may be more cost-effective.
Ultimately, the decision is not just about today’s cost but also about future savings, reliability, and comfort.
Key Factors That Influence Replacement Decisions
Several important factors can help determine whether repairing or replacing your AC system makes more sense. Evaluating these elements carefully ensures you avoid spending money on short-term fixes when a long-term solution would serve you better.
Age of the System
Most air conditioners have a lifespan of 10 to 15 years. As systems age, they become less efficient and more prone to breakdowns. If your AC unit is approaching or exceeding this range, replacement is often the smarter investment.
Frequency of Repairs
If you find yourself calling for service multiple times each year, those repair costs can quickly add up. Frequent breakdowns are a strong indicator that your system is nearing the end of its usable life.
Cost of the Repair
Not all repairs are equal. Replacing a small component is very different from repairing a compressor or refrigerant leak. Major repairs can cost a significant percentage of a new system, making replacement more appealing.
Energy Efficiency Ratings
Older units typically have lower SEER ratings, meaning they consume more energy to cool your home. Newer systems are designed to be far more efficient, which can lead to substantial savings on monthly utility bills.
Refrigerant Type
If your system uses outdated refrigerants such as R-22, repairs can become more expensive due to limited availability. Upgrading to a modern system using current refrigerants can save money and reduce environmental impact.
AC repair vs. replacement cost for older systems
Older systems present a unique challenge when comparing AC repair vs. replacement cost. While it may be tempting to continue repairing a unit you already own, aging equipment often comes with hidden costs.
Parts become harder to find and more expensive
Efficiency declines, increasing energy bills
Breakdowns become more frequent and less predictable
Repairs may only provide temporary fixes
In many cases, replacing an older system can provide better value over time, even if the upfront cost is higher. Investing in a new unit eliminates the uncertainty and ongoing expenses associated with aging equipment.
How Efficiency Impacts Long-Term Cooling Costs
Energy efficiency plays a major role in the total cost of owning and operating an air conditioning system. While repair costs are immediate, efficiency savings accumulate month after month.
Lower Utility Bills
Modern AC systems are designed to use less energy while delivering better cooling performance. Upgrading to a high-efficiency unit can significantly reduce your electricity usage, especially during peak summer months.
Improved Environmental Impact
Energy-efficient systems reduce your home’s carbon footprint by consuming less power. This not only benefits the environment but can also align with energy-saving incentives or rebates.
Consistent Performance
Newer systems provide more consistent cooling, eliminating hot spots and maintaining a comfortable indoor temperature throughout your home.
Cooling performance and comfort concerns
Beyond cost, comfort is a critical factor when deciding between repair and replacement. An air conditioner that struggles to maintain a consistent temperature can negatively impact your daily life.
Common performance issues include:
Uneven cooling between rooms
Weak airflow or insufficient cooling
Excess humidity indoors
Loud or unusual noises during operation
If your system no longer provides reliable comfort, repairing it may not fully resolve the issue. Replacement can offer a noticeable improvement in both performance and indoor air quality.
Warranty coverage and repair limitations
Warranty coverage is another key consideration when comparing AC repair vs. replacement cost. Understanding what is covered can influence your decision significantly.
New systems often come with manufacturer warranties that cover parts for several years
Some warranties also include labor coverage when installed by certified professionals
Older systems are typically out of warranty, meaning all repair costs are out of pocket
Additionally, certain repairs may not be possible due to discontinued parts or outdated technology. In these situations, replacement may be the only viable option.
Frequently Asked Questions
How do I know if I should repair or replace my AC?
If your system is relatively new and the repair is minor, repairing is usually the best option. However, if the unit is older, inefficient, or requires frequent repairs, replacement may provide better long-term value.
What is the average lifespan of an air conditioner?
Most air conditioning systems last between 10 and 15 years with proper maintenance. After this point, efficiency declines and repair needs increase.
Is it worth repairing a 10-year-old AC unit?
It depends on the cost of the repair and the overall condition of the system. If the repair is inexpensive and the unit is otherwise functioning well, repair may be worthwhile. For larger repairs, replacement is often a better investment.
Will a new AC system lower my energy bills?
Yes. Modern systems are significantly more energy-efficient than older models, which can lead to noticeable savings on monthly utility bills.
How much does AC replacement typically cost?
Costs vary depending on the size of your home, system type, and installation requirements. While the upfront investment is higher than repairs, long-term savings and reliability often justify the expense.
Can I keep repairing my AC indefinitely?
While it is possible to continue repairing an older system, it becomes less practical over time due to increasing costs, reduced efficiency, and declining performance.
Make the Right Choice with Expert Guidance
Choosing between repairing and replacing your air conditioner is not always straightforward. It requires a careful evaluation of costs, system age, efficiency, and comfort needs. Making the right decision can save you money, improve your home’s comfort, and provide peace of mind for years to come.
For homeowners in Jackson and Jennings County, the trusted team at Schneider Plumbing, Heating & Air Conditioning is here to help. With over 70 years of experience, this family-owned company is dedicated to delivering reliable, high-quality HVAC solutions that improve your everyday comfort. Whether you need an honest repair assessment or are considering a full system replacement, their experts will guide you every step of the way.
Contact us today to schedule your service or consultation and experience the difference of working with a team committed to your comfort and satisfaction.
Plumbing problems rarely happen at a convenient time. A dripping faucet or slow drain may seem like a minor annoyance, but other plumbing issues escalate rapidly and require immediate attention. When a pipe bursts, a toilet overflows, or water begins pooling where it should not be, delaying action can lead to structural damage, costly repairs, and even health risks. That is why same-day plumbing repair is essential when urgent plumbing problems occur. Acting quickly allows homeowners to limit water damage, protect their property, and restore normal household function before the situation worsens.
In many cases, plumbing systems are hidden behind walls, beneath floors, and inside ceilings. When a failure occurs, water can travel quickly through structural materials, insulation, and electrical areas. What starts as a small issue in the morning can become a major repair by the evening. Understanding which plumbing problems require immediate service helps homeowners respond quickly and prevent serious complications.
Plumbing Problems That Require Same-Day Plumbing Repair
Some plumbing issues can wait a day or two for service. Others cannot. When water is actively leaking, flooding is occurring, or sanitation is compromised, same-day repair becomes critical. These problems escalate quickly and can damage flooring, drywall, cabinets, and foundations if ignored.
Common plumbing problems that require immediate attention include:
Burst or cracked pipes
Active water leaks inside walls or ceilings
Overflowing toilets that will not stop running
Sewer backups or foul odors coming from drains
Water heater leaks or sudden loss of hot water
Major fixture failures such as broken faucets or shower valves
Sudden drops in water pressure that indicate pipe damage
If any of these situations occur, it is best to contact a professional plumber right away. Fast response prevents the issue from spreading and reduces the risk of more expensive restoration work.
Same-day plumbing repair for active leaks
Active leaks are one of the most urgent plumbing issues homeowners face. Even a small leak can release gallons of water over time, soaking building materials and encouraging mold growth. The longer water continues to escape, the greater the damage becomes.
Signs of an active plumbing leak include:
Water stains on ceilings or walls
Puddles forming near appliances or fixtures
Unexplained increases in water bills
The sound of running water when no fixtures are in use
Damp flooring or warped wood
A leaking pipe inside a wall is especially concerning. Moisture trapped behind drywall can weaken structural materials and create the ideal environment for mold and mildew. Mold growth can begin within 24 to 48 hours after water exposure, which is why immediate plumbing repair is so important.
Professional plumbers use specialized tools such as leak detection equipment, moisture meters, and inspection cameras to identify the exact source of the problem. Once located, they can repair or replace the damaged pipe before the leak spreads further throughout the home.
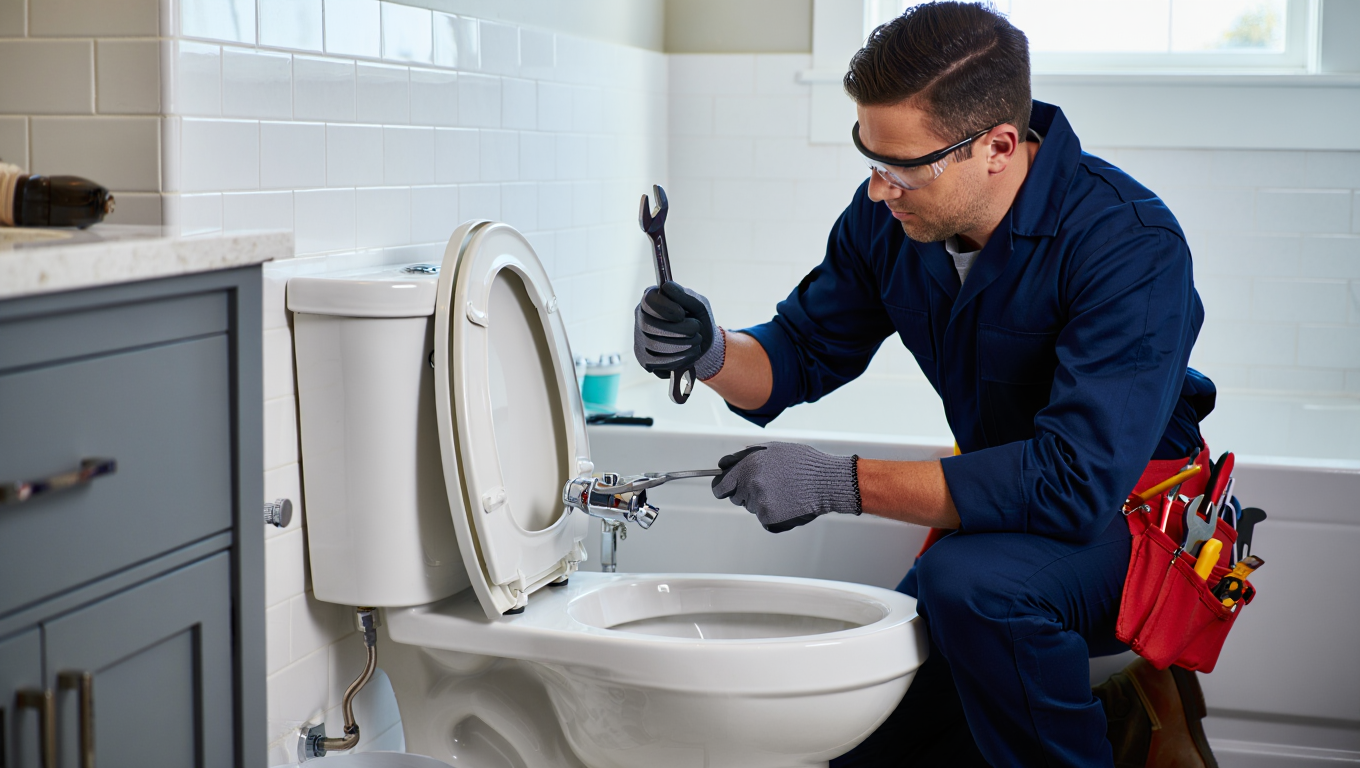
Overflowing toilets and fixture failures
Few plumbing issues are as stressful as an overflowing toilet. When wastewater begins spilling onto the bathroom floor, it creates both property damage and a potential health hazard. Sewage contains bacteria and contaminants that can make cleanup difficult and unsafe.
Overflowing toilets are commonly caused by:
Severe drain clogs
Blocked sewer lines
Faulty fill valves or flappers
Plumbing vent problems
Similarly, fixture failures such as broken faucets, damaged shower valves, or cracked supply lines can release large amounts of water very quickly. A failed fixture can flood a bathroom or kitchen within minutes if the water supply is not shut off immediately.
Professional plumbers can diagnose the cause of the problem and restore proper function quickly. Same-day plumbing repair prevents ongoing flooding and protects nearby flooring, cabinetry, and drywall.
Risks of Delaying Urgent Plumbing Issues
Waiting too long to address serious plumbing problems can lead to consequences that extend far beyond a simple repair. Water is incredibly destructive when left uncontrolled, and plumbing failures can impact multiple areas of a home at once.
Some of the most significant risks of delaying urgent plumbing issues include the following.
Structural damage to the home
Water can weaken structural components such as wood framing, subfloors, and drywall. Over time, this damage can compromise the stability of walls, ceilings, and floors.
Mold and mildew growth
Excess moisture provides ideal conditions for mold development. Mold spores spread quickly and may trigger allergies, respiratory issues, and unpleasant odors throughout the home.
Electrical hazards
Water leaking near electrical wiring or outlets can create dangerous situations. Electrical systems exposed to moisture may short-circuit or pose a shock risk.
Increased repair costs
What begins as a small leak may eventually require drywall replacement, flooring repairs, mold remediation, and structural restoration. Addressing the problem immediately is far more affordable.
Health concerns from sewage exposure
Sewer backups and overflowing toilets expose households to harmful bacteria and pathogens. Prompt plumbing repair helps restore sanitary conditions quickly.
Plumbing systems are interconnected, which means a failure in one location can impact multiple fixtures and appliances. Acting quickly reduces the likelihood of additional complications developing.
How Same-Day Plumbing Repair Saves Money Long-Term
Homeowners sometimes hesitate to schedule emergency plumbing service because they worry about the immediate cost. However, delaying necessary repairs often leads to far greater expenses later.
Same-day plumbing repair helps save money in several important ways.
Prevents widespread water damage
Addressing leaks immediately limits the amount of water that can soak into building materials. Preventing structural damage avoids costly reconstruction.
Reduces restoration expenses
Water damage restoration may involve drying equipment, mold treatment, and material replacement. Fast plumbing repair reduces the need for these services.
Protects valuable appliances and fixtures
Leaks near water heaters, dishwashers, washing machines, or cabinets can damage these expensive items. Immediate repair protects household investments.
Avoids higher utility bills
Undetected leaks can waste hundreds or even thousands of gallons of water. Fixing the problem quickly keeps water bills under control.
Preserves property value
Homes with unresolved water damage or mold issues may lose value or require extensive repairs before they can be sold. Prompt plumbing service protects the long-term condition of the property.
In many cases, the cost of a same-day plumbing repair is significantly lower than the cost of repairing widespread water damage that develops over time.
Choosing a plumber who offers same-day plumbing repair
When urgent plumbing issues arise, homeowners need a reliable professional who can respond quickly. Choosing the right plumbing company ensures that the problem will be diagnosed accurately and repaired efficiently.
When selecting a plumber for same-day service, consider the following factors:
Experience with emergency plumbing repairs
Fast response times and availability
Proper licensing and insurance
Positive customer reviews and local reputation
Transparent pricing and clear communication
An experienced plumber will arrive prepared with the tools and parts needed to address many common plumbing problems during the same visit. This allows homeowners to restore their plumbing system quickly and minimize disruption to daily life.
Working with a trusted local company also ensures that technicians understand the plumbing systems commonly found in homes throughout the area.
Frequently Asked Questions About Same-Day Plumbing Repair
How do I know if my plumbing issue is an emergency?
If water is actively leaking, flooding is occurring, sewage is backing up, or you have lost access to essential plumbing fixtures, the issue should be addressed immediately. These problems can quickly cause property damage or health risks.
Can a small leak really cause major damage?
Yes. Even small leaks can release significant amounts of water over time. Moisture can spread behind walls and floors, causing structural damage and mold growth if not repaired promptly.
What should I do while waiting for the plumber to arrive?
If possible, shut off the water supply to the affected fixture or to the entire home using the main shutoff valve. Move valuable items away from the leak and try to contain water with towels or buckets.
Is same-day plumbing repair more expensive?
Emergency plumbing service may cost slightly more than scheduled appointments. However, repairing the issue quickly usually saves money by preventing larger repairs and water damage restoration.
How long do most plumbing repairs take?
The time required depends on the type of problem. Minor repairs may take less than an hour, while more complex issues, such as pipe replacements or sewer repairs, may take longer.
Contact Schneider Plumbing, Heating & Air Conditioning for Reliable Same-Day Plumbing Repair
When a plumbing emergency happens, you need a team you can trust to respond quickly and fix the problem correctly. For more than 70 years, Schneider Plumbing, Heating & Air Conditioning has been a dependable plumbing provider helping homeowners throughout Jackson and Jennings County live more comfortably.
As a family-owned HVAC and plumbing company, Schneider Plumbing, Heating & Air Conditioning is committed to improving customers’ lives through dependable service and high-quality workmanship. Our experienced technicians understand how stressful plumbing emergencies can be, and they work quickly to restore safety and comfort to your home.
Whether you are dealing with an active leak, an overflowing toilet, or a sudden plumbing failure, our team is ready to help with professional same-day plumbing repair.
If you need expert plumbing service today, contact us to schedule an appointment with the trusted professionals at Schneider Plumbing, Heating & Air Conditioning. Our experienced team is ready to provide the reliable service your home deserves.